Definition: Portrait photography, or portraiture, is a type of photography aimed toward capturing the personality of a person or group of people by using effective lighting, backdrops, and poses. A portrait photograph may be artistic or clinical.
“I believe that everyone wears a mask, and beneath that mask is another mask. So what photographers can reveal are the various masks we all wear.” |
I find this quote inspirational to my project because I strongly agree that people wear many different masks in their everyday life. I want to see through these masks through my photography and portray someone as their authentic and beautiful self.
|
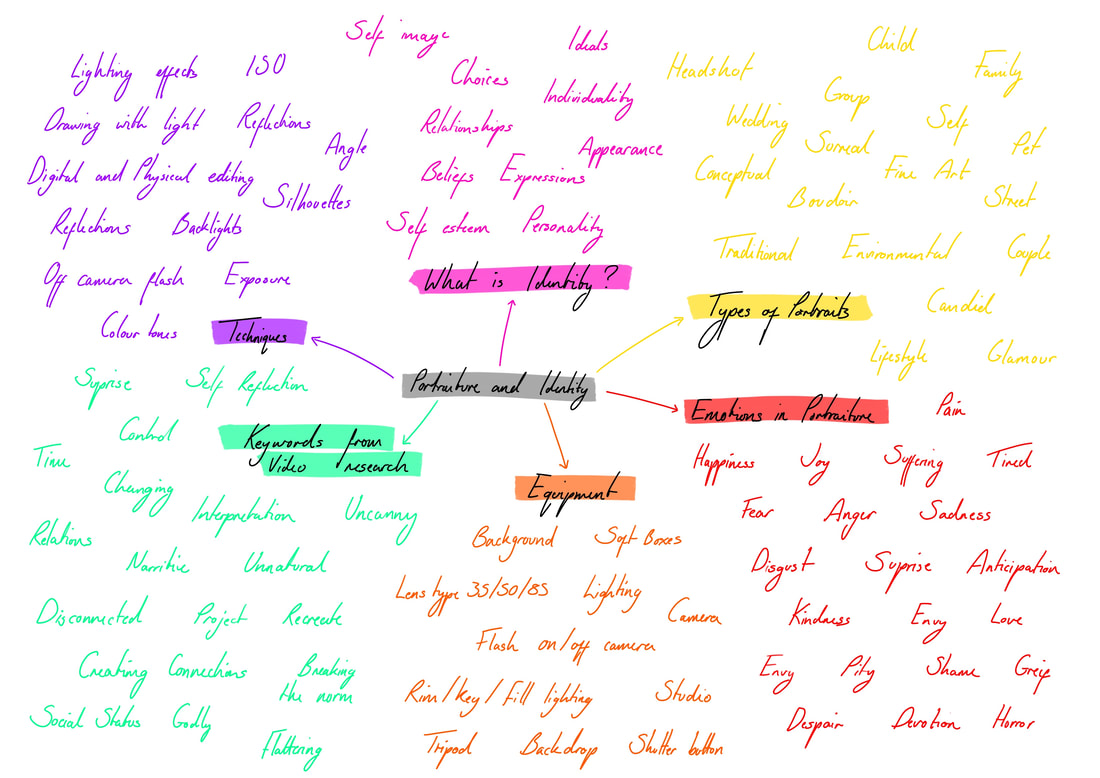
mind map
|

|
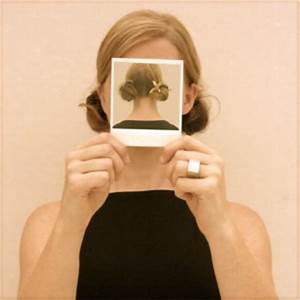
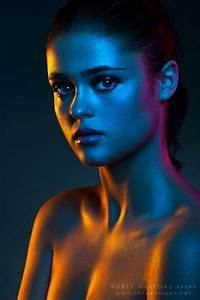
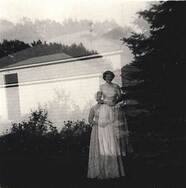
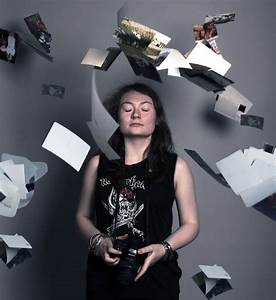
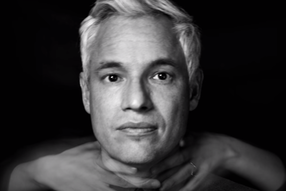
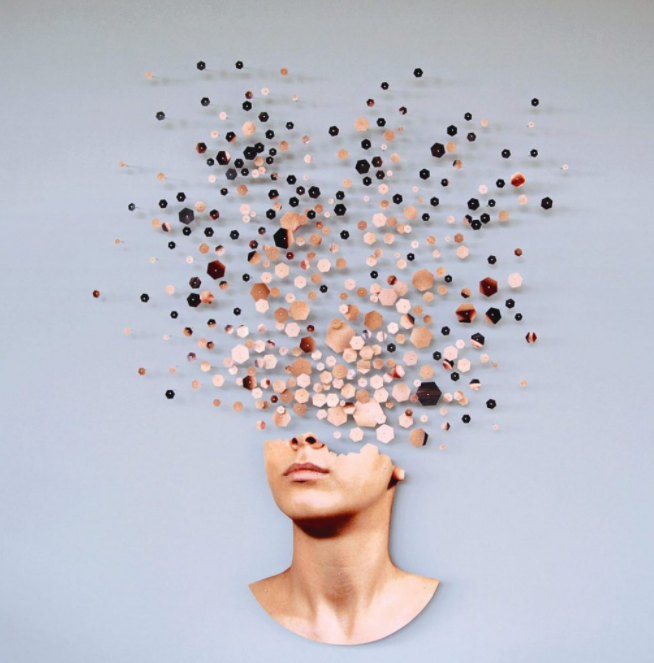
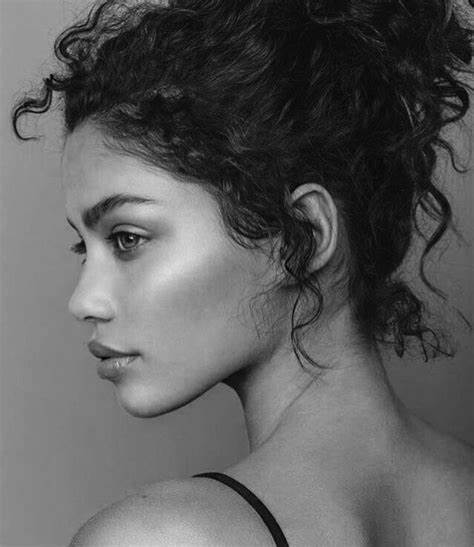
early inspirational images
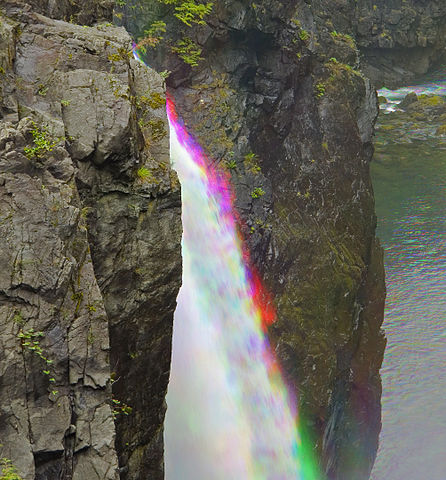
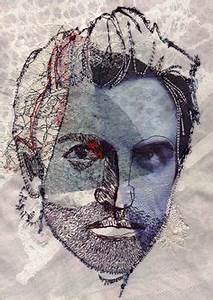
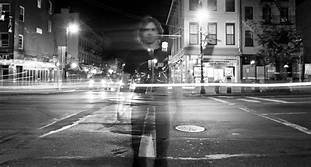
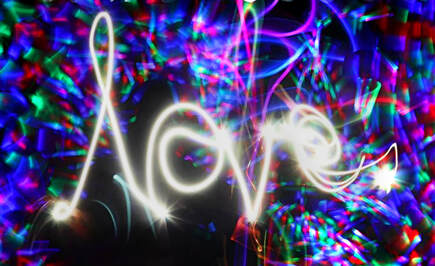
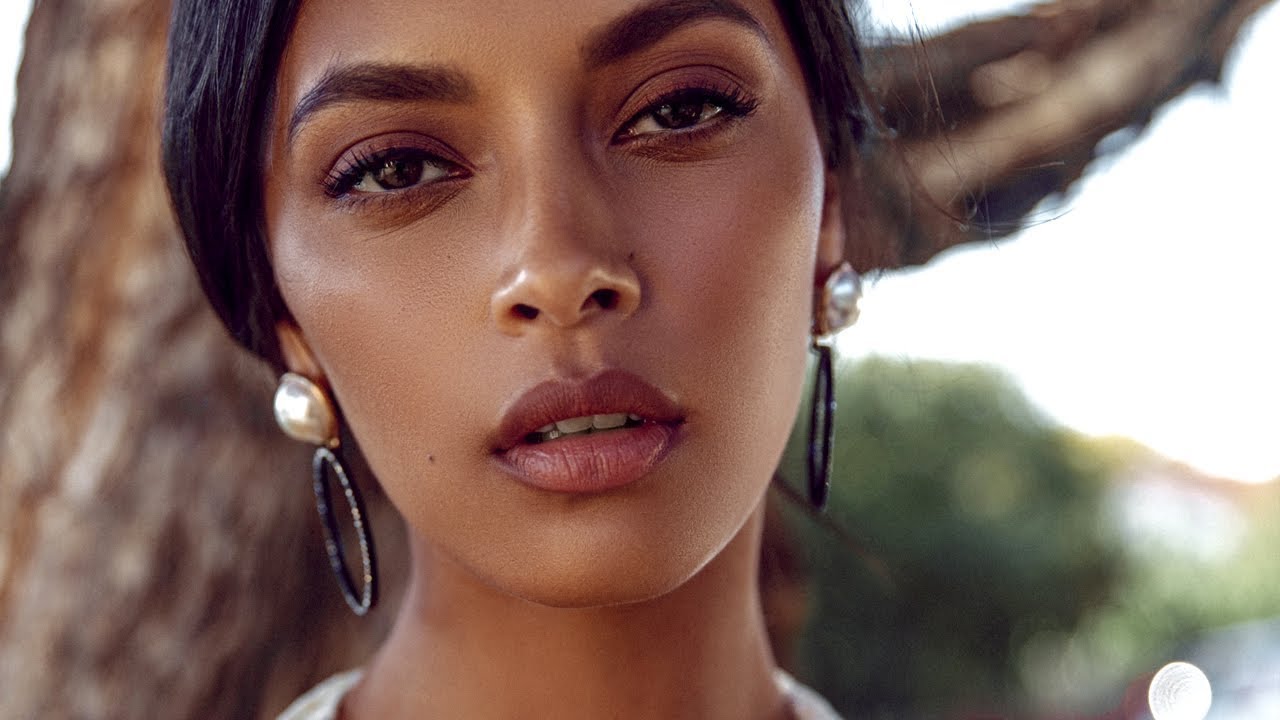
Following the written mind map, I began to investigate portrait photography and identity samples. Below are the findings from this research. I feel the most inspirational image for me is the 'Gel' portrait. I am very interested in this style of portrait photography as the different coloured light is used for fill, back and key lights. I feel it creates a very warm atmosphere and almost ethereal effect as the colours bring out key features and define shapes.
professional portraiture workshop - collaborative shoot
|
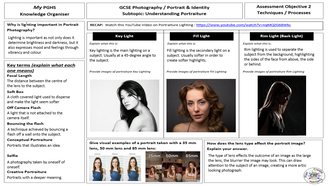
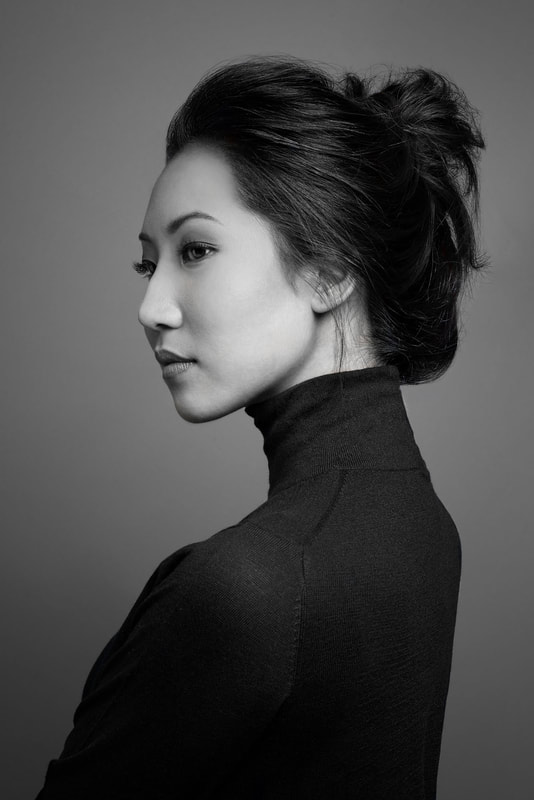
- Before starting this project, I created a knowledge organiser and looked at videos detailing how to effectively use light in photography. I learnt about key, fill and back lighting and how to use these properly.
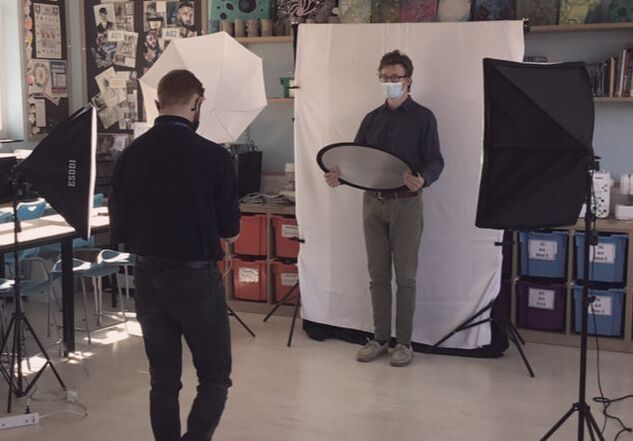
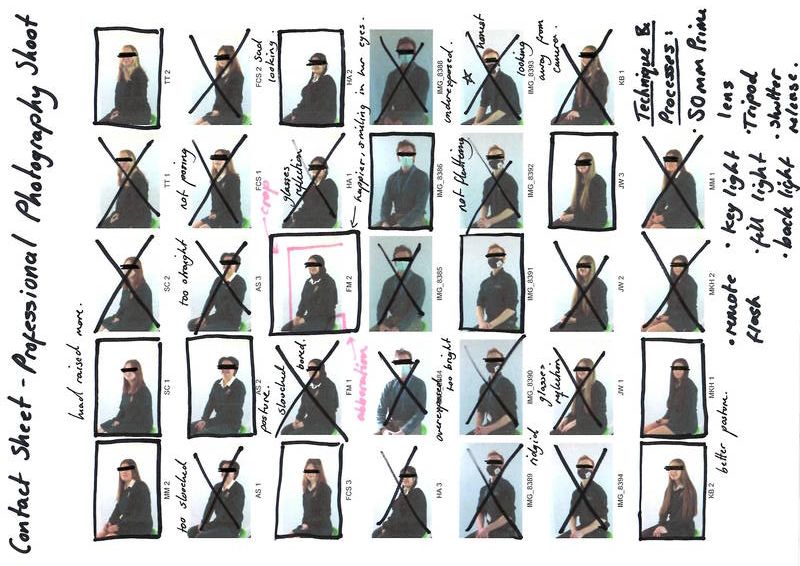
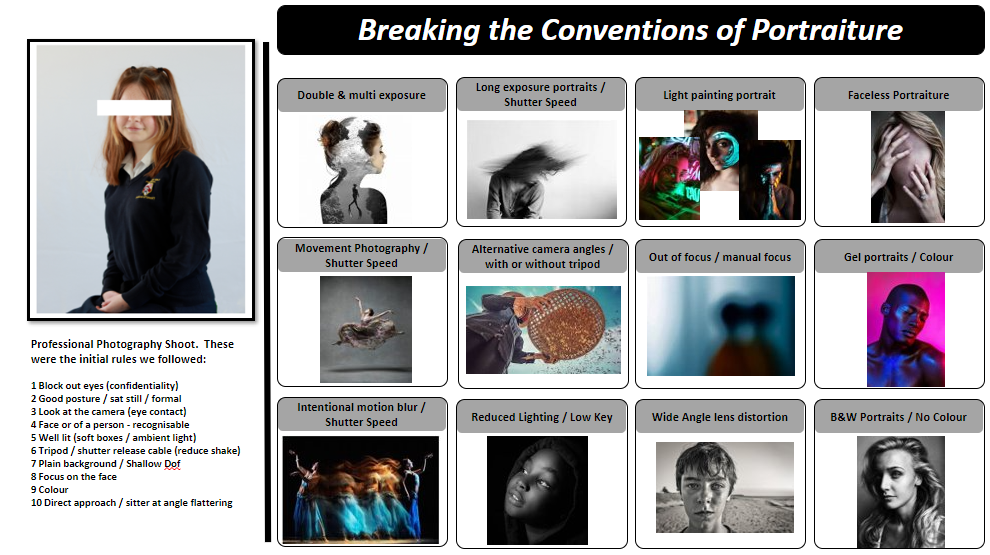
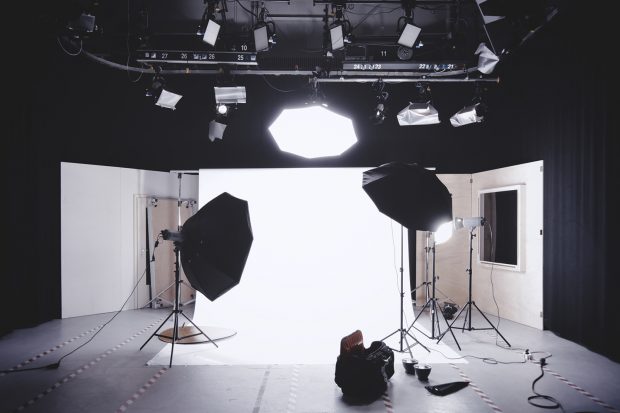
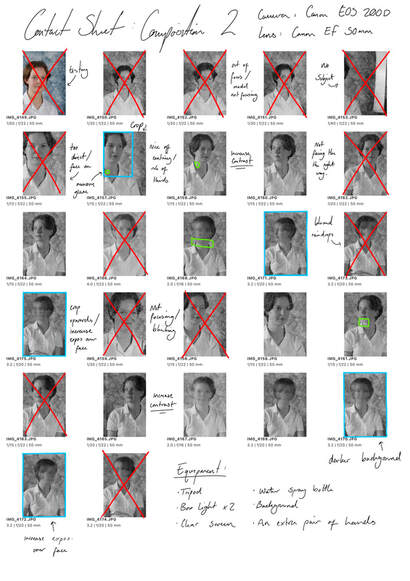
- In the professional portraiture workshop, I learnt about set up and how to use studio lighting to your advantage. In this shoot, the aim was to create mature portrait for year book photos. The white backdrop and strong white light make the model stand out, creating a clear headshot. - Our shoot took place during midday. As it was a sunny day, there was a lot of natural light coming through the windows, however we still set up 3 different lights to highlight the sitters face. We had a fill, rim and back light which were made using soft boxes. These soft boxes softened the light and made the image look natural. We also used a tripod in order to stabilise our images, reducing camera shake. - There were many risks we had to consider during this shoot. These were only amplified due to COVID. Each model was wearing a facemask, only briefly taking it off during the actual shoot, during that time we were all socially distanced from the sitter. My peers and I were also wearing facemasks, further preventing the spread of COVID. There were other risks such as camera shake and glare in glasses, meaning the set was slightly adjusted each time to suit the sitter. Sitters were warned off trip hazards, safely allowing them to take their seat. - Overall, this shoot greatly helped me understand how shoots with live subjects can work. I also learnt about model confidentiality and consent. Because of this, my contact sheet was edited to remove eyes and names, keeping each sitter anonymous. |
contact sheet
digital edits
|
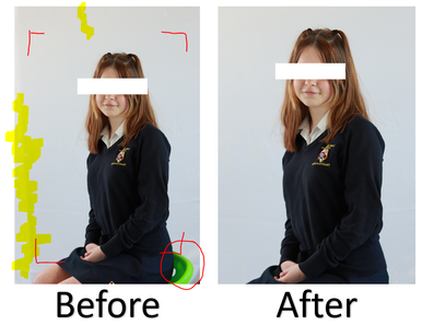
To edit these images, I first cropped down my image to create a balanced look. I followed the rule of thirds and made sure to keep my subject between those guidelines. Next, I used the clone tool to remove the chair, creating a professional image. Afterwards, I used the magic lasso tool to select any blemishes of the image and remove them, furthermore adding to the professional feel of the image, Finally, I used the blur filter to create a smooth background. If I was unhappy with the overall look at the end, I could make a few changes to the exposure/lighting/shadows, finalising my image. |
research and investigation - breaking the rules
After investigating portraiture in school setting, I can now move onto alternative methods of portraiture by 'breaking the rules'. One of the first rule I will be breaking is that a portrait must be a single exposed face with certain clear features like the eyes, nose, mouth and so on...
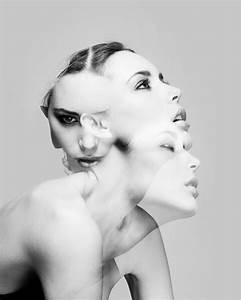
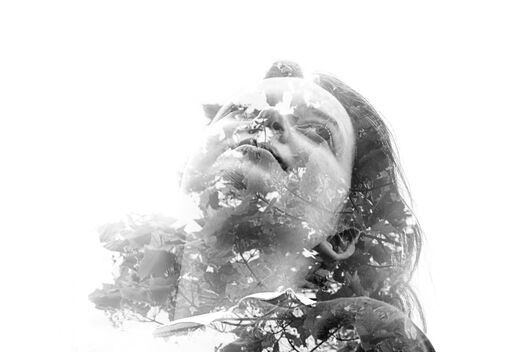
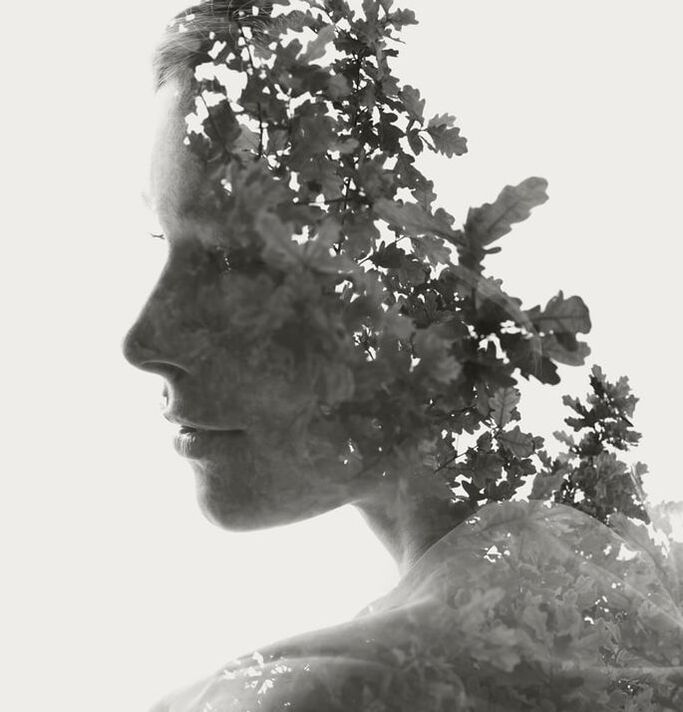
Double and multi exposure
|
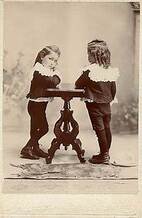
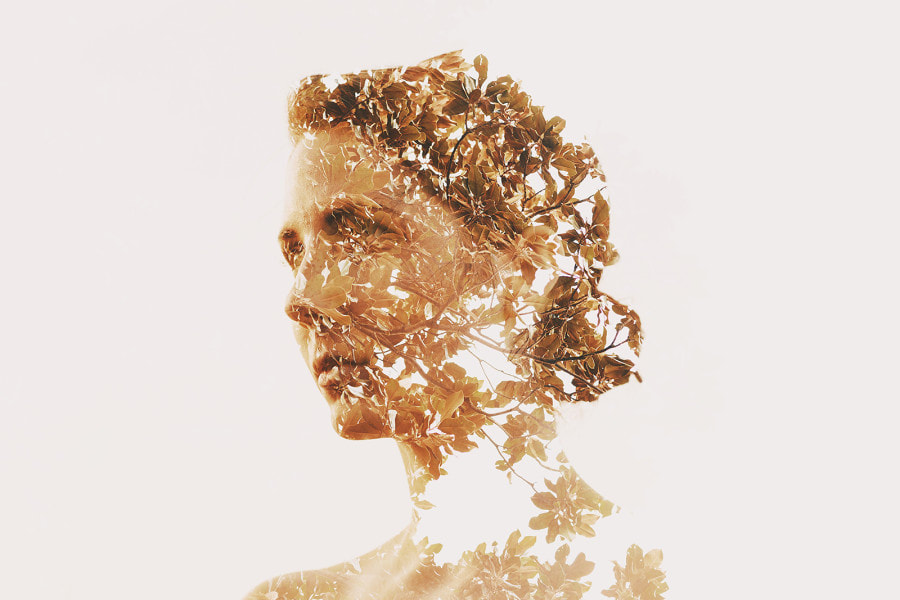
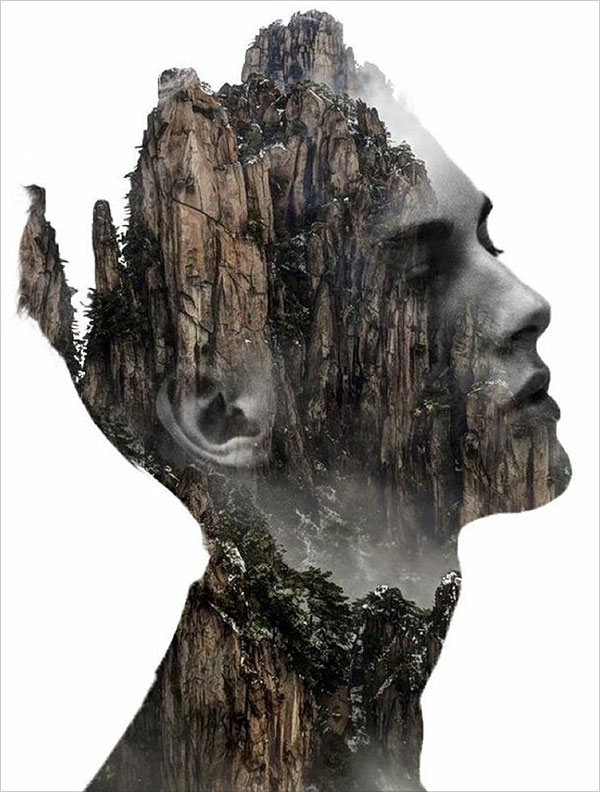
Double and multi exposure is when two or more images are combined together to create something mysterious and interesting to look at. The first double or multi exposure images were created in Victorian England, where photography was becoming more popular for poor people too. Photographers would shoot over already used film to create a ghostly look, take the right image as an example; to us it just looks like twins, when in reality this was a double exposed image on the same child appearing twice. Double or multiple exposure is a brilliant tool for photographers as it can present different sides of a subject through the same image.
|
|
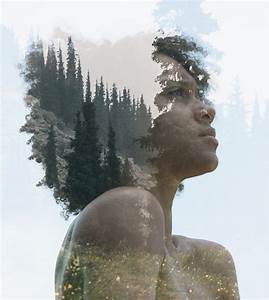
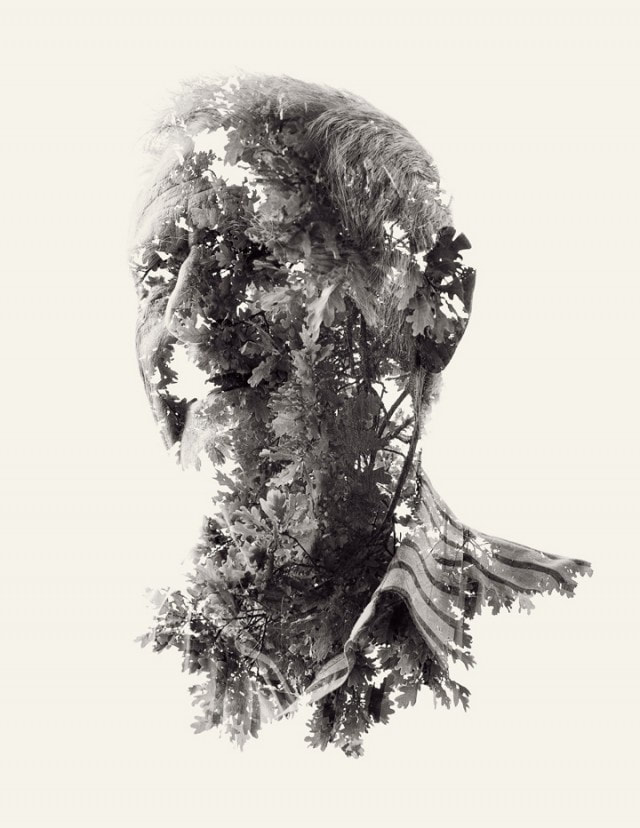
Contemporary Double and Multi Exposures
DOuble and multi exposure - Initial experiments
Computer Initial Experiments / PIXLR
Video tutorial; Side Profile, background.
|
|
|
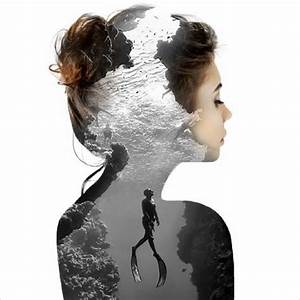
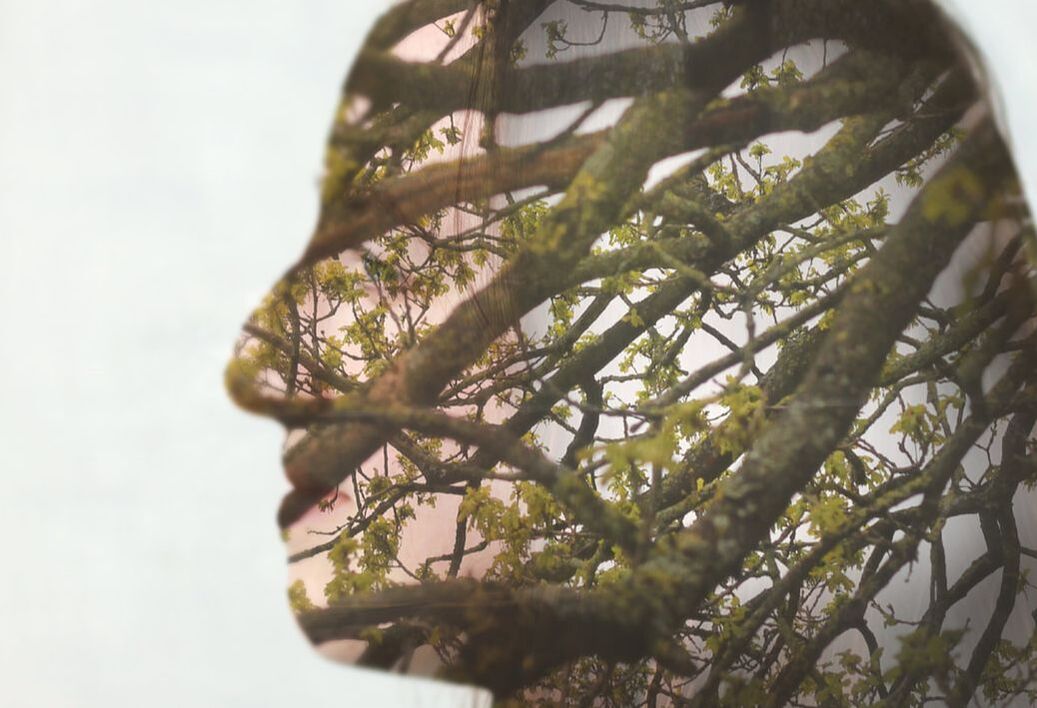
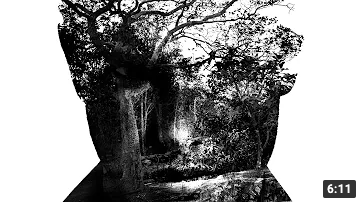
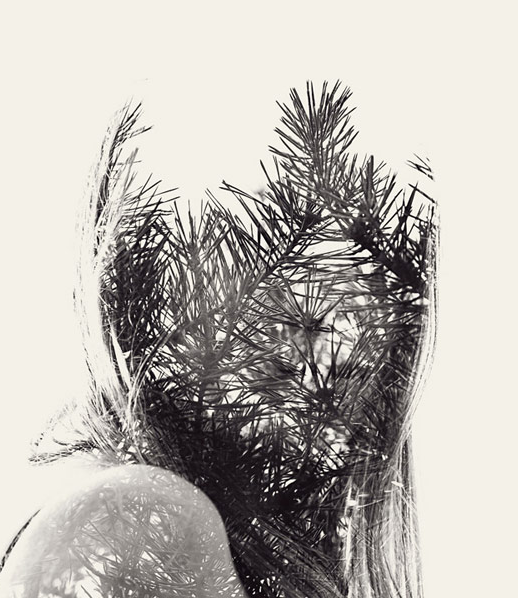
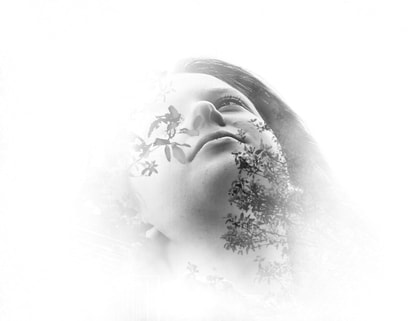
image evaluationPersonally, I feel this edit came out very well. The mask is defined, however, you can still see the true tones of the model's face coming through. This creates a blend of nature and humans, resulting in an effective image. I also really like how the colours turned out. The yellows and greens of the leaves compliment the peach tones of the model's face, it also creates a warmer feel to the photograph as a whole.
Although, one thing I could have improved on was the feathering around the face. After looking at the image again, the edges seem unfocused and unprofessional, next time I will lower the feather, creating a clearer image. From creating this piece, I've learnt about using double exposure and overexposure to my advantage to create a studio-like image. |
|
Home experiments - snapseed app
Video tutorial; Side Profile, background.
|
|
|
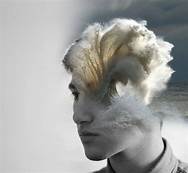
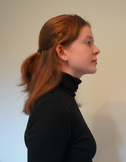
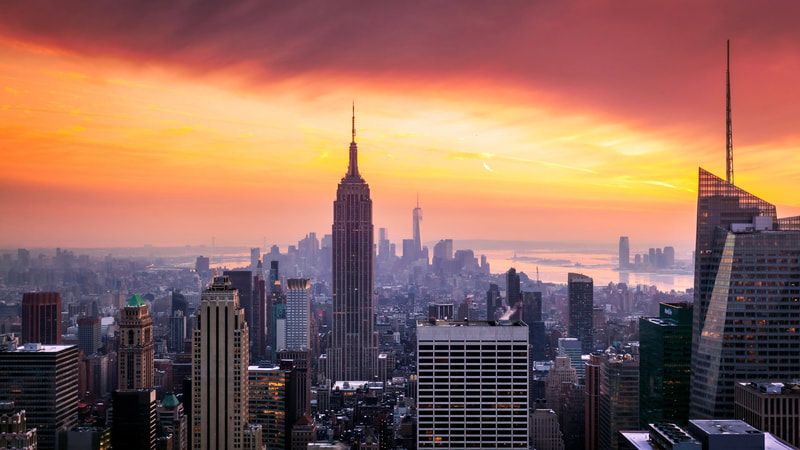
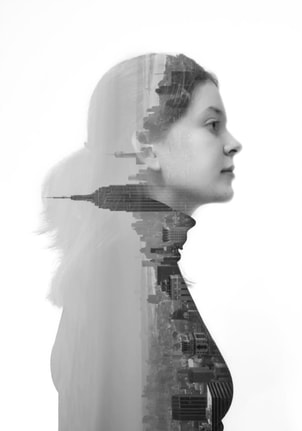
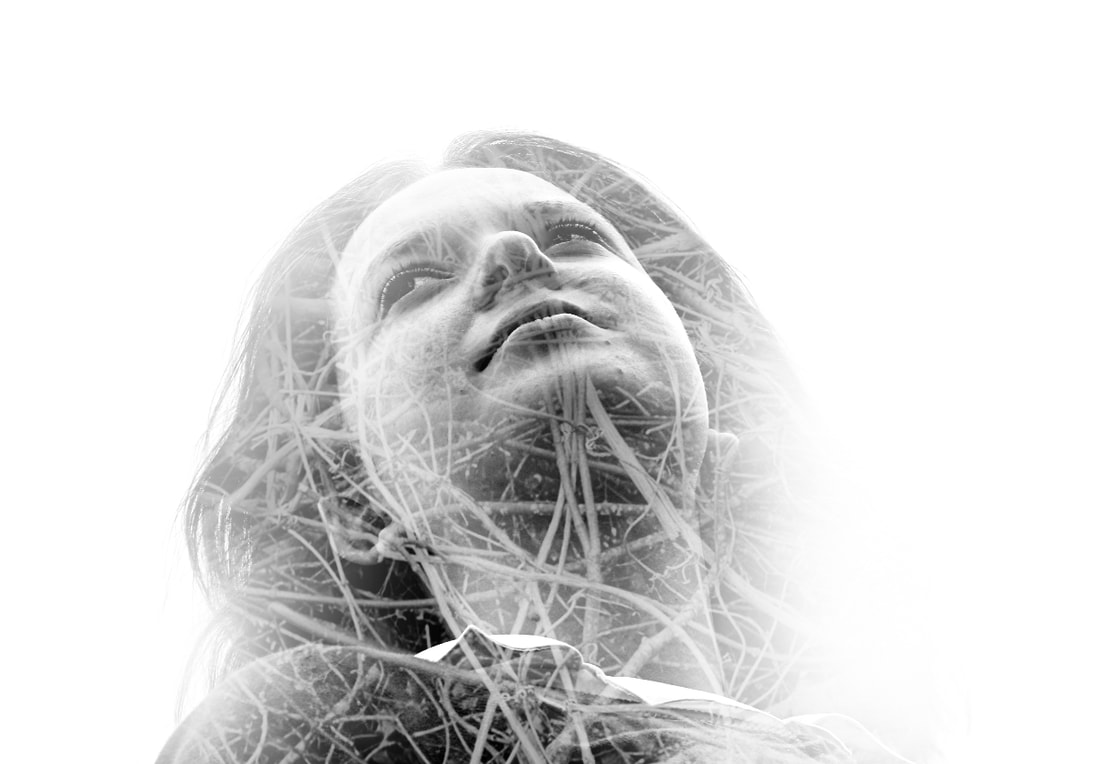
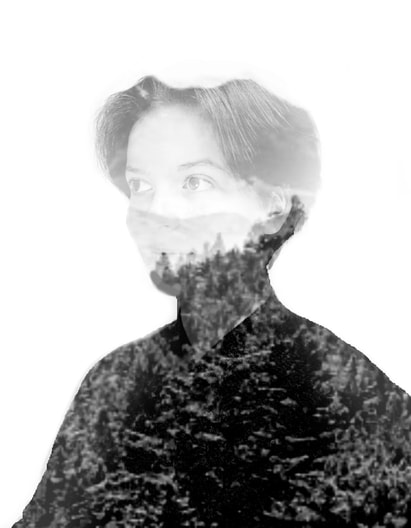
image evaluationI feel I did very well editing this image. I really like how the overlay came out and how well it blends with my body. When I look at this image, I feel very tranquil and calm as the whites on my face and double exposure aren't too overexposed, as this would make the overall image very bright and fake. However, I could improve by taking my own double exposure rather than finding one from the internet - this would help make my image authentic and closer portray my photographic skills. I have learnt a lot from this shoot! Overall, I feel much more confident with different tools and techniques that different editing applications, such as PIXLR and SnapSeed, have to use. This will greatly help me in the future as I am now able to understand and use different features that I once couldn't use. A new skill is creating the double exposure using the mask tool, different blend modes and layering. I also learnt that contrast can be a good tool for creating a moodier image. Another skill I acquired is learning how to use negative space to my advantage. Having negative space helps bring out the main subject, drawing the viewers eye to the double exposure. Having negative space also helps keep your photograph simple and not too overloaded with different shapes, ideas and forms.
|
|
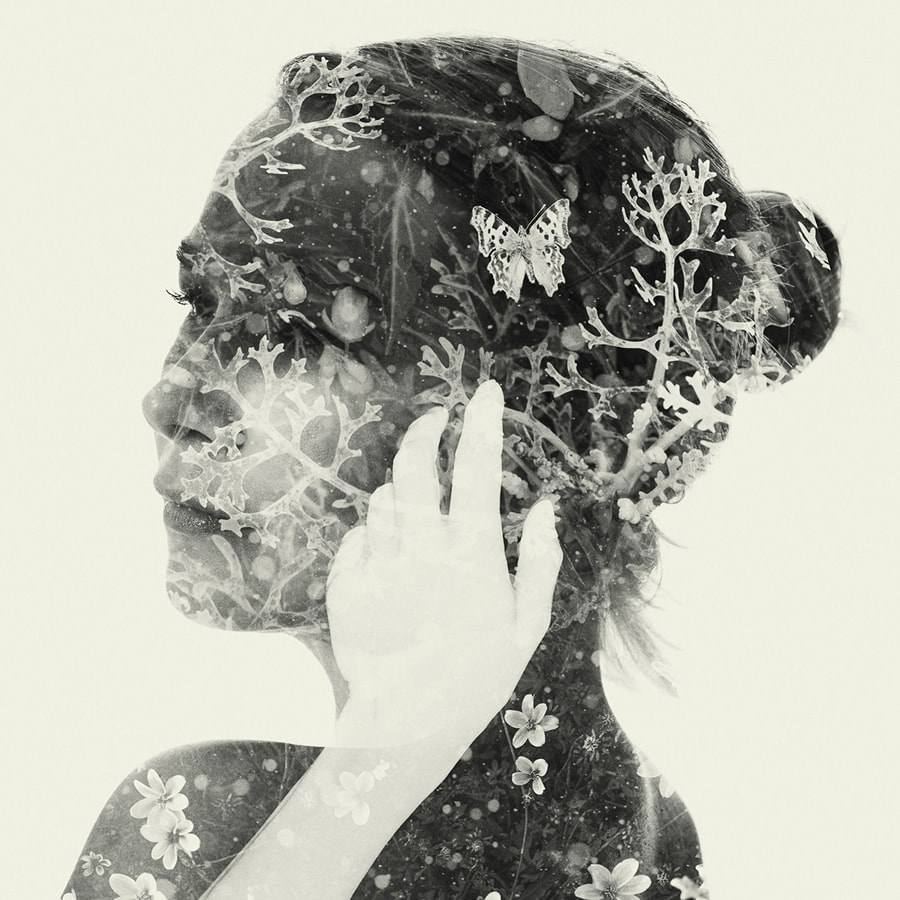
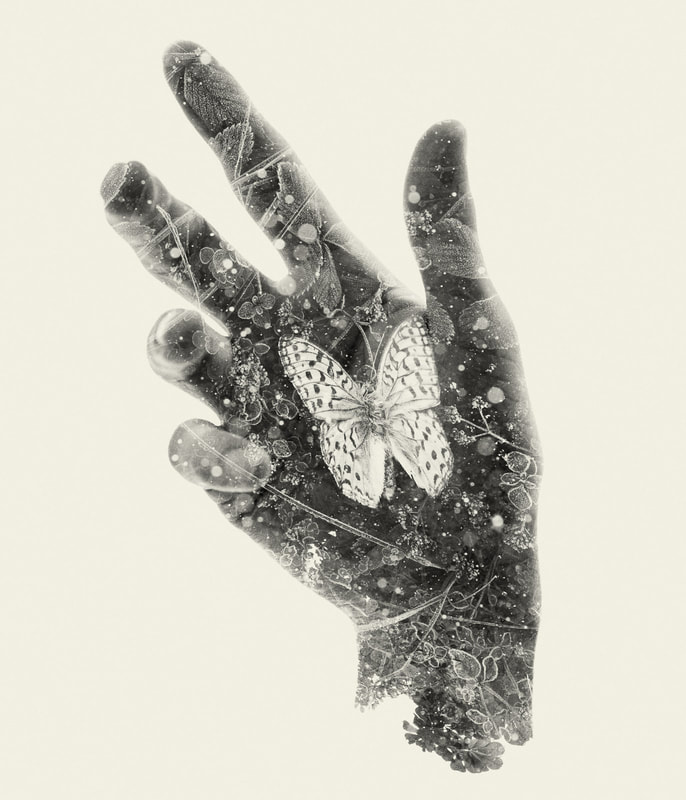
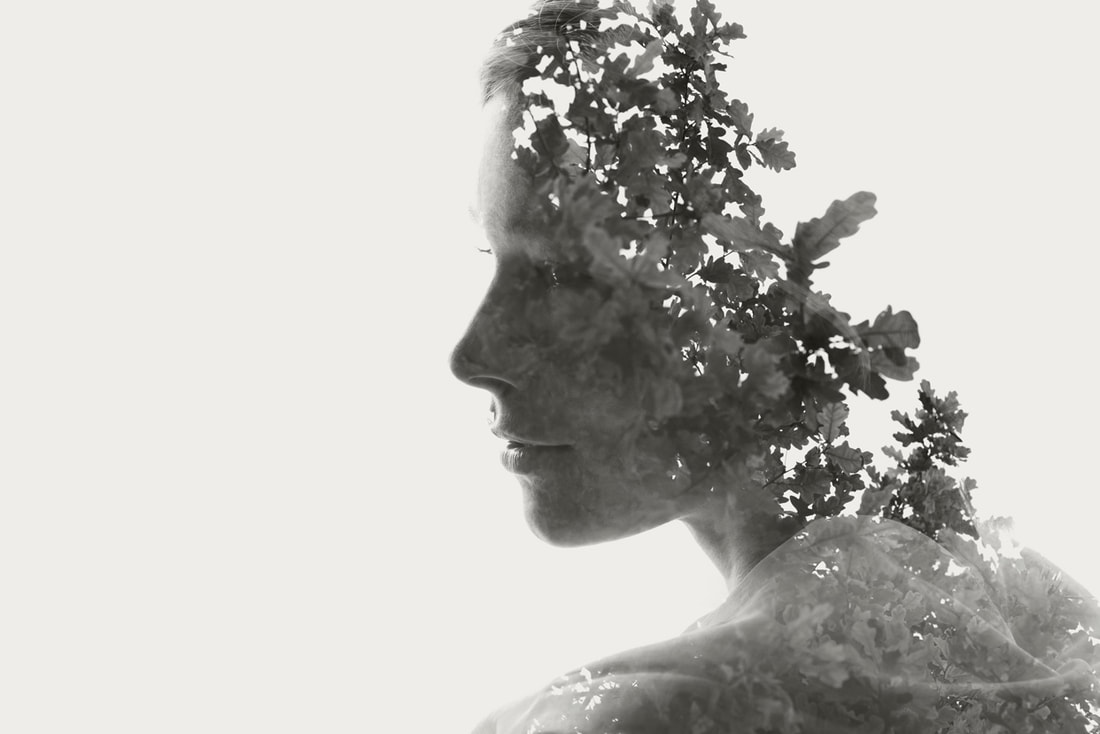
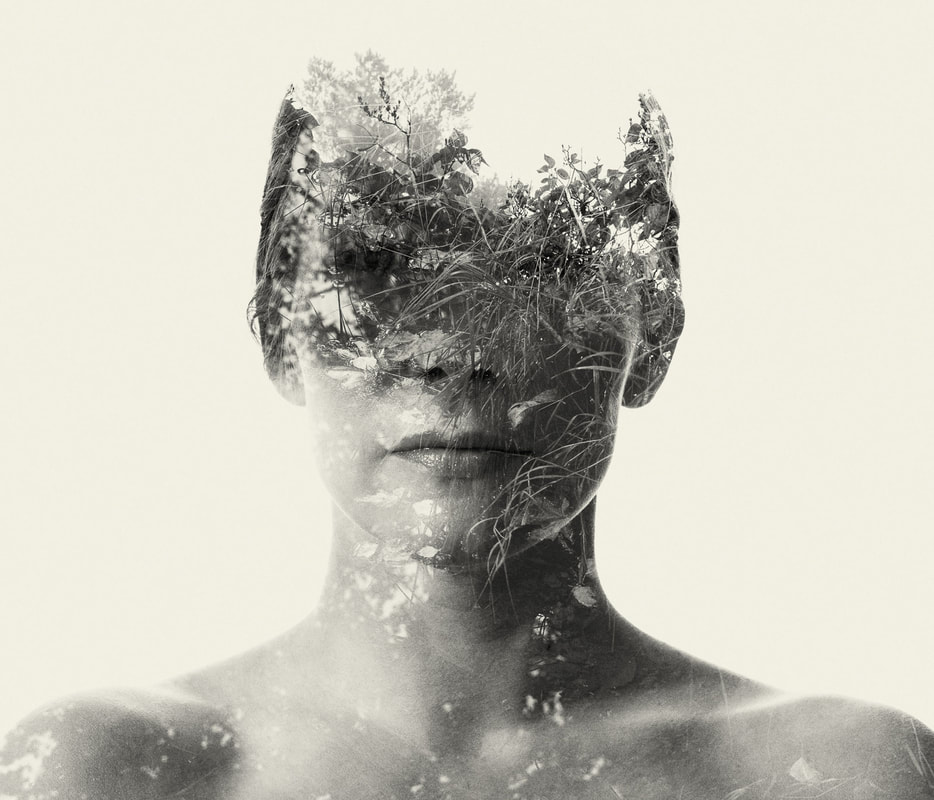
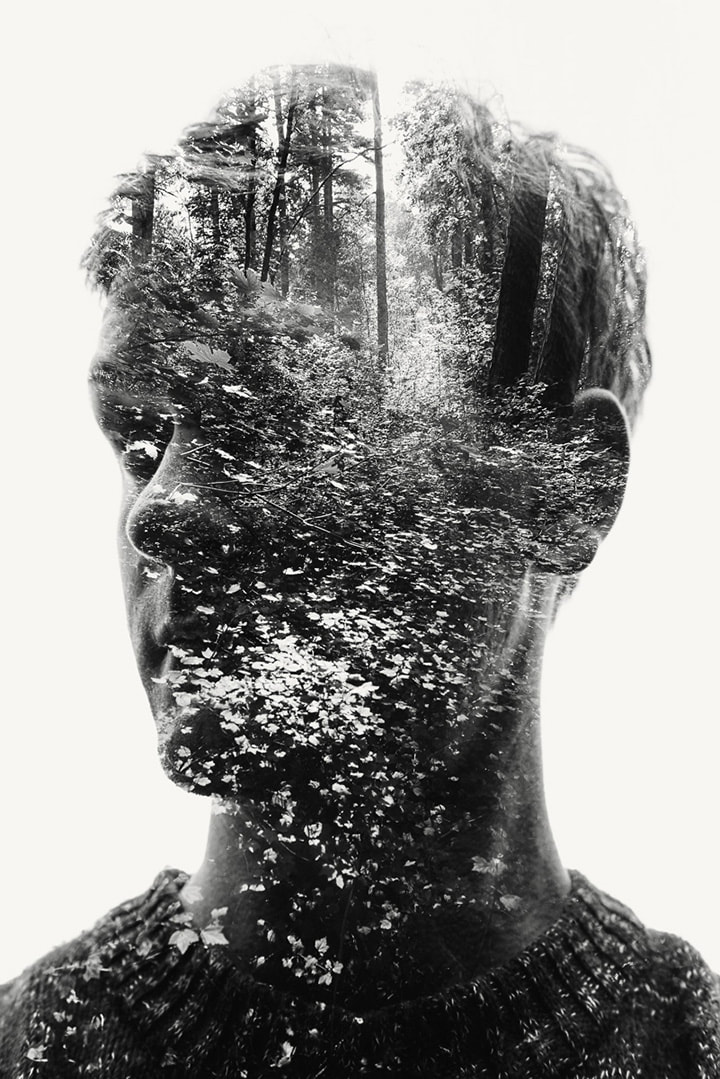
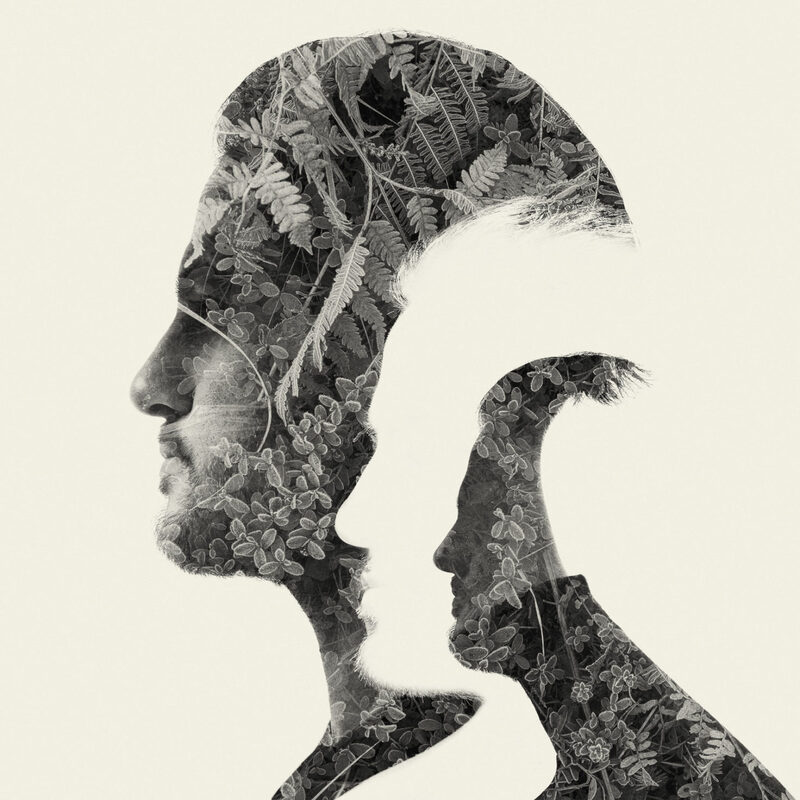
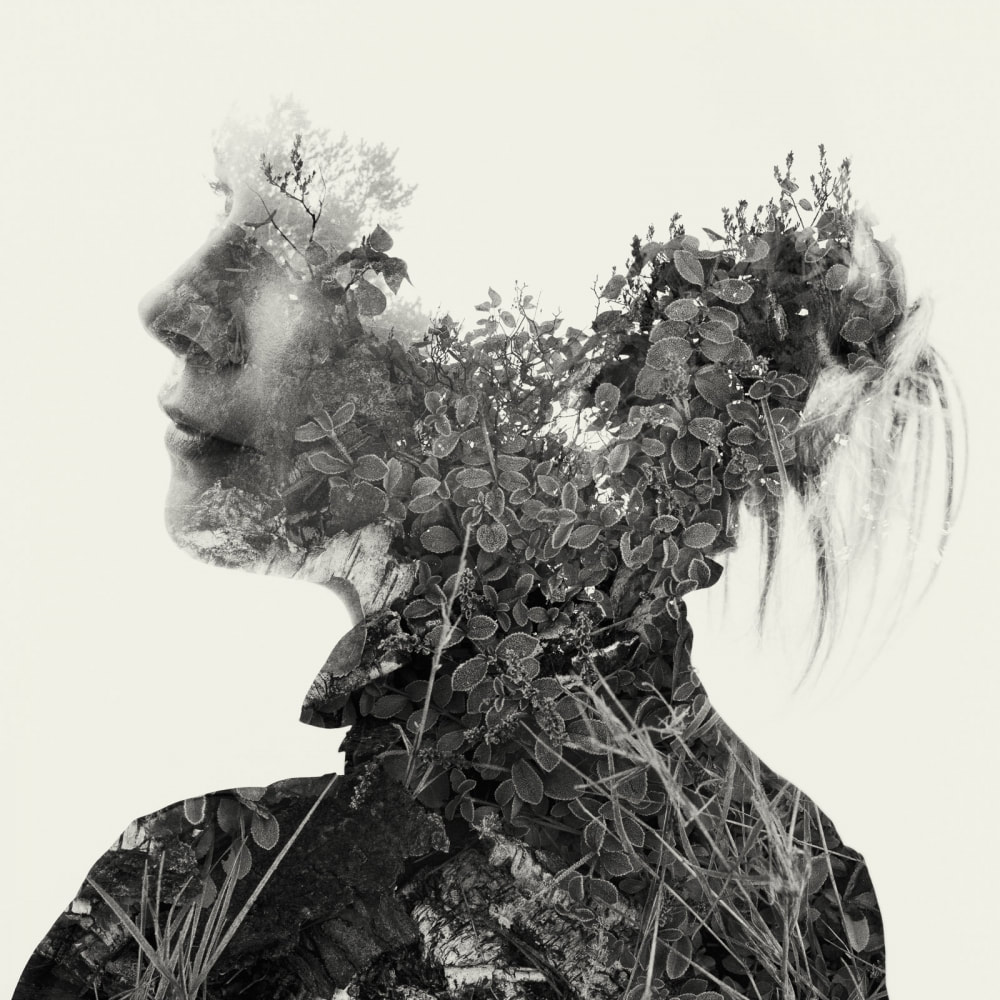
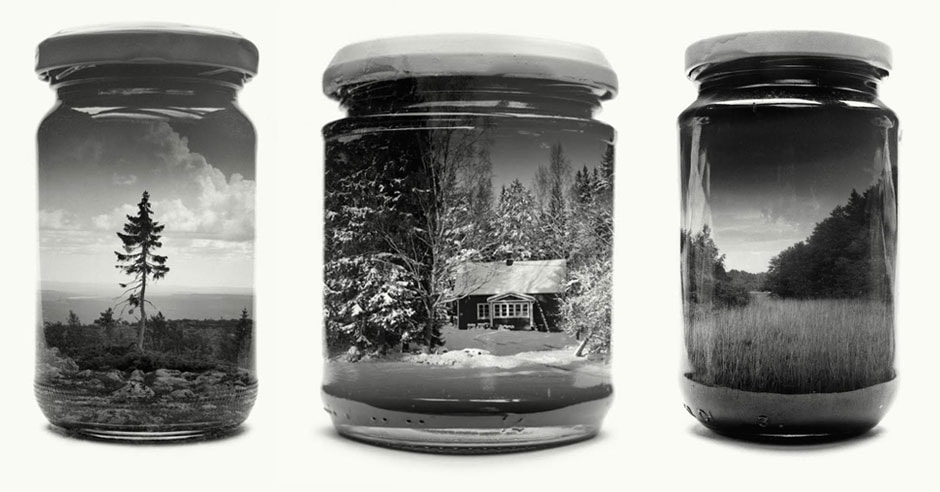
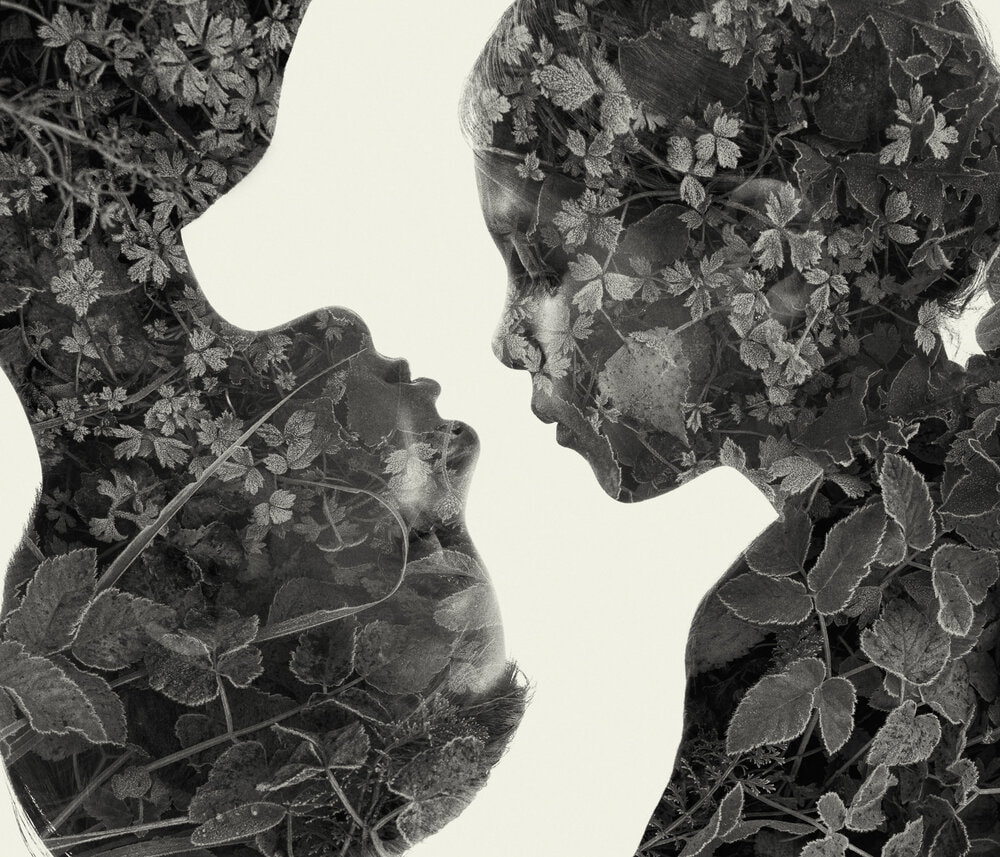
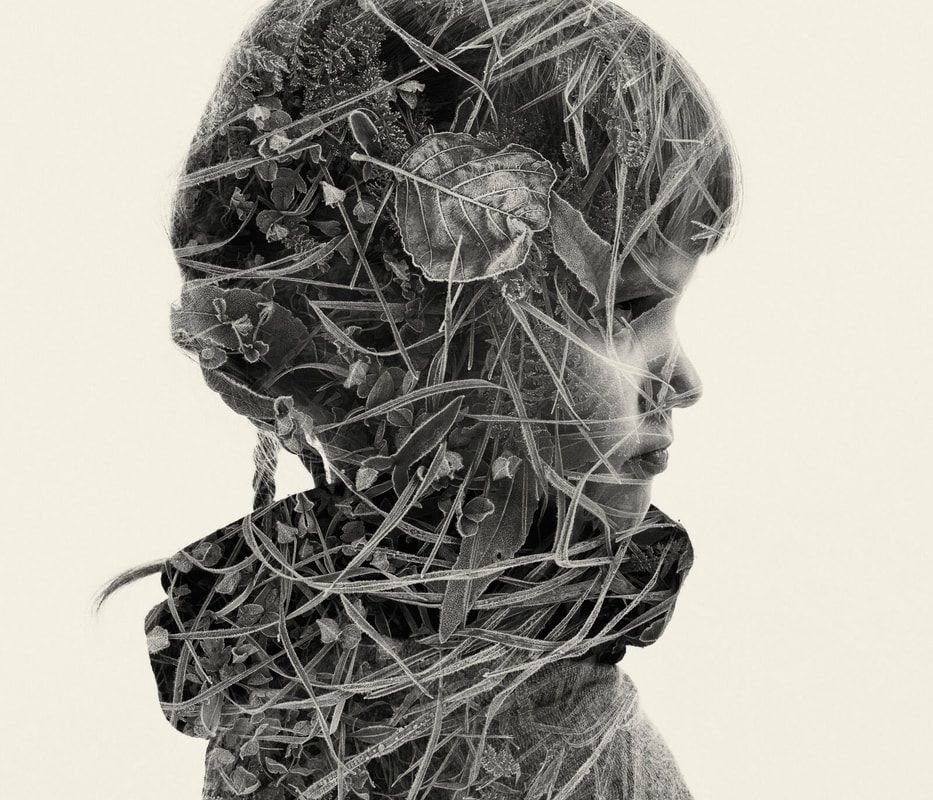
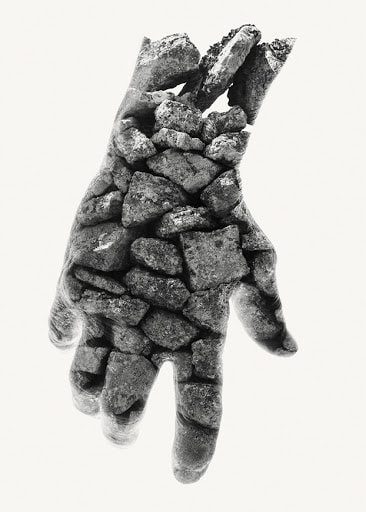
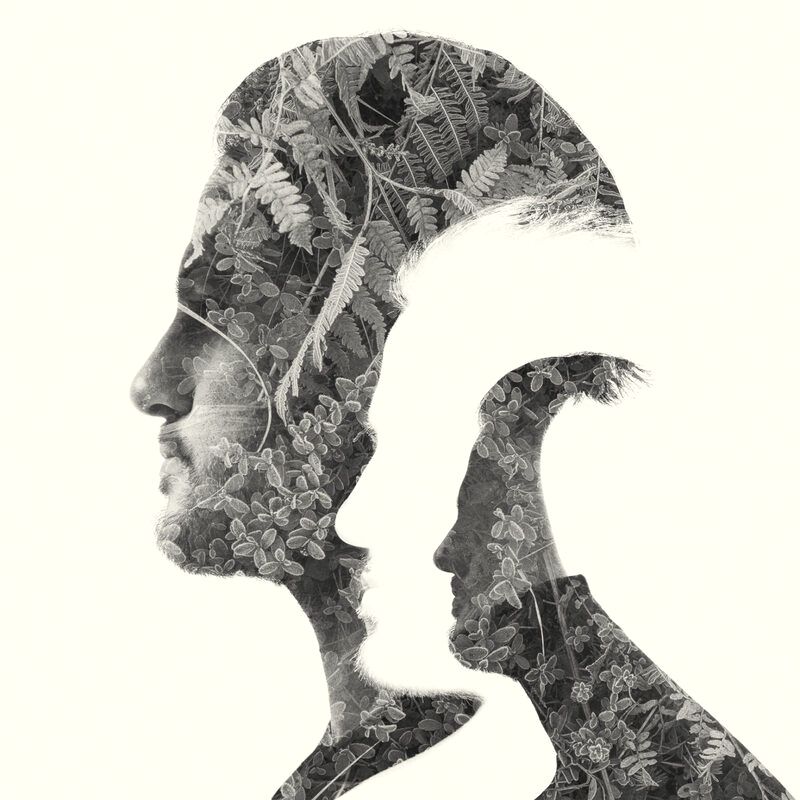
christoffer relander - Artist investigation
|
“Reality can be beautiful, but the surreal often absorbs me. Photography to me is a way to express and stimulate my imagination. Nature is simply the world. With alternative and experimental camera techniques I am able to create artworks that otherwise only would be possible through painting or digital manipulation in an external software.” |
|
Why this artist?
For my first artist investigation, I will be studying the work of Christoffer Relander. I decided to study his work as it focuses heavily on double and multi exposure, an effect I have been studying in this topic so far. His work combines nature and human features in a unique and creative way. Who are they? Relander was born in 1986 in a small town by the name of Ekenäs, near Helsinki. He has been interested in art and photography since a young age, eventually teaching himself photography and editing. His work has been exhibited in many locations across the world, such as Finland, Russia, Norway, Spain, Portugal and the United States. Why this quote? I believe this quote presents Relander's attitudes to art and life perfectly. I feel it also gives an overview on how Relander operates and builds ideas for new images in his head after seeing something that sparked his interest. |
Christoffer Relander
|

techniques
Relander's main technique is double and multi exposure. This technique entails editing two images on top of eachother to create a new and abstract image. Different filters can be applied to the overlayed image, morphing the image with exposure, highlights and shadows. Although Gerace does create some colourful pieces, his most recognisable work is in black and white.
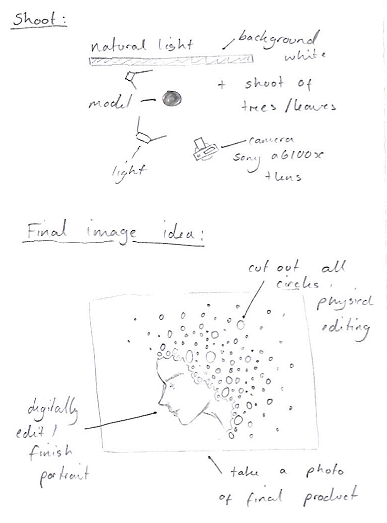
shoot plan
|
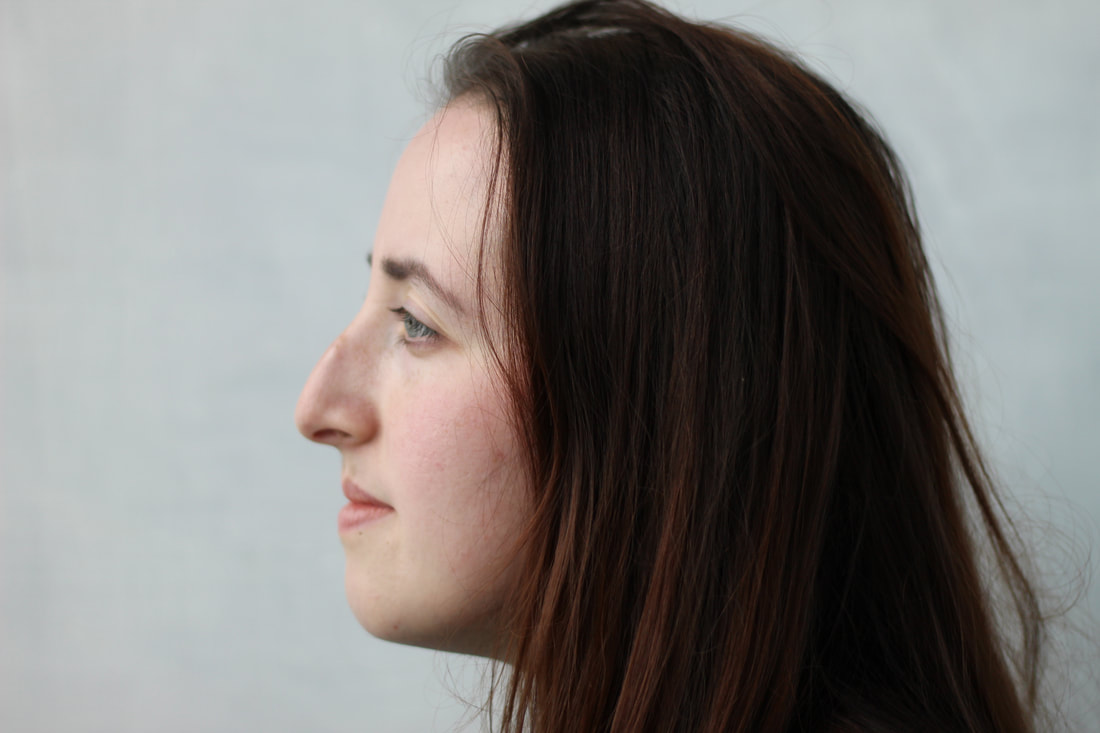
My inspiration for this shoot is the work of Christoffer Relander. Mainly, the images shown previously. The location for this shoot is outdoors, as the sky can be used as a clean background and the natural forms are easy to shoot. The location would need good amounts of lighting and a wide variety of plants, shrubs and tree skyline. A helpful prop to have onhand would be a tripod. Having a stable camera leads to clean, blur-free shots that work well in editing. The lighting should be very natural and bright, preferably taken on a sunny day with little cloud. If the shoot cannot be done outside, then the model should be shot inside with studio lighting. A white background and a dark t-shirt or jumper, making the natural overlay stand out against the model. My equipment will be a Sony a6100 using a basic kit lens. My shutter speed will be very fast, around 1/200 or more. My f/ will be around f/11, not too big or too small but somewhere in the middle to create a clean image. Post shoot effects will be changing the image levels to appear black and white and then overlaying and masking to create a double exposed image.
|
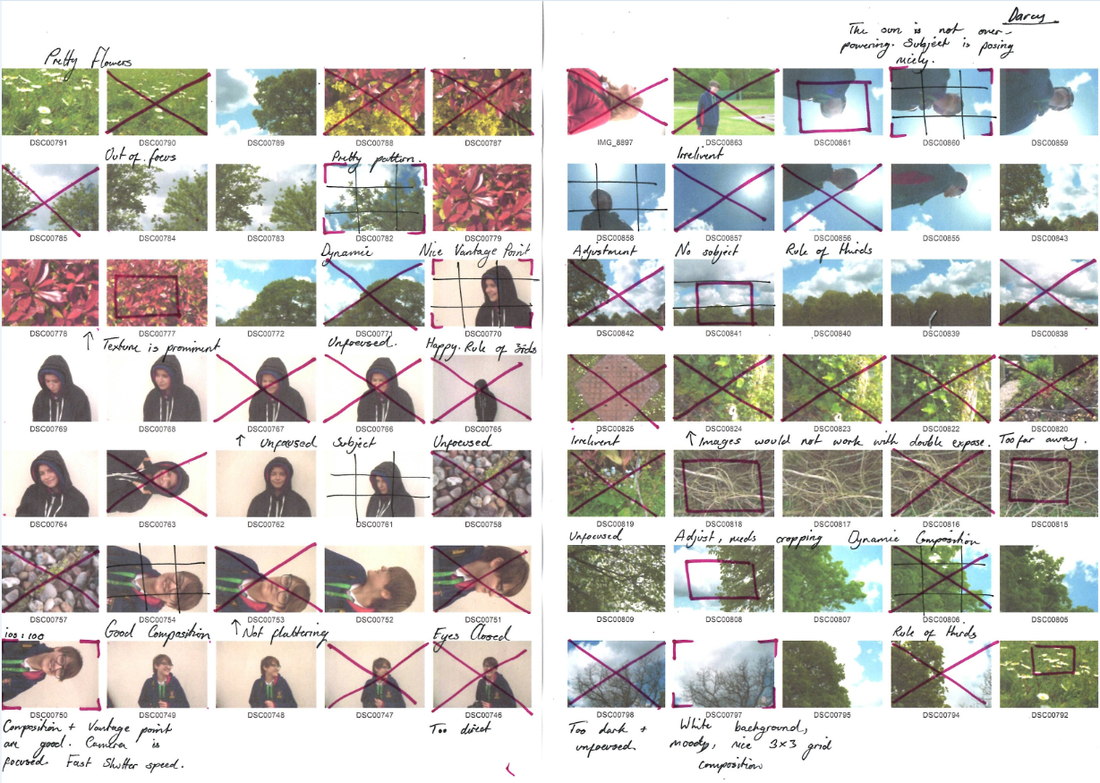
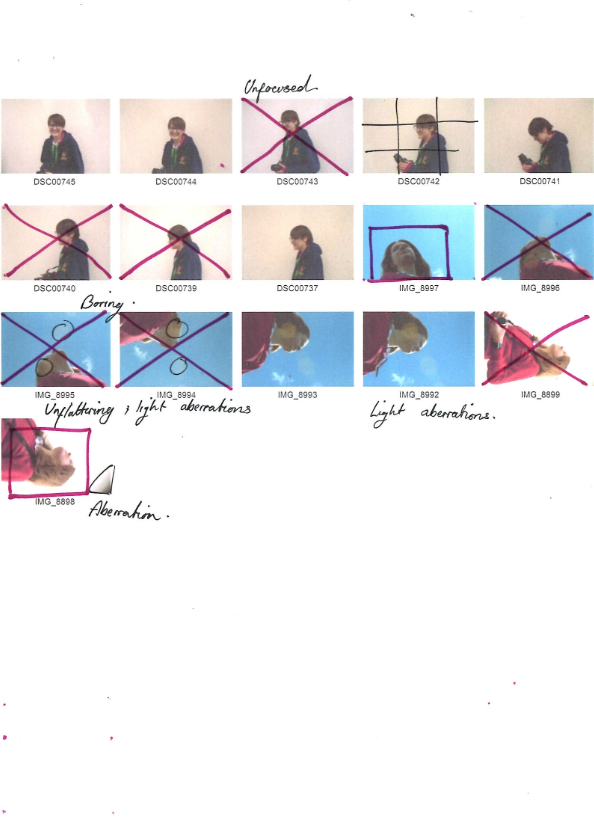
contact sheet
digital edits
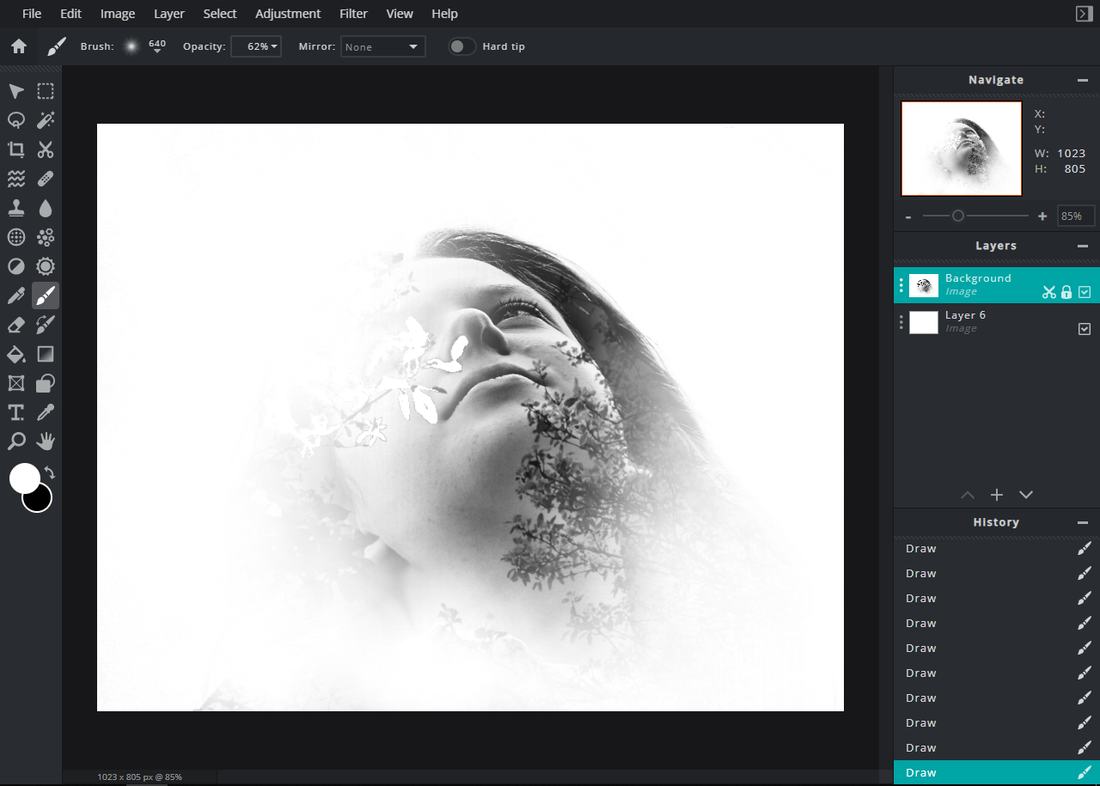
Step 1 - In this stage, I prepared the image by reducing the saturation and carefully adjusting highlights and shadows to create a base for my edits.
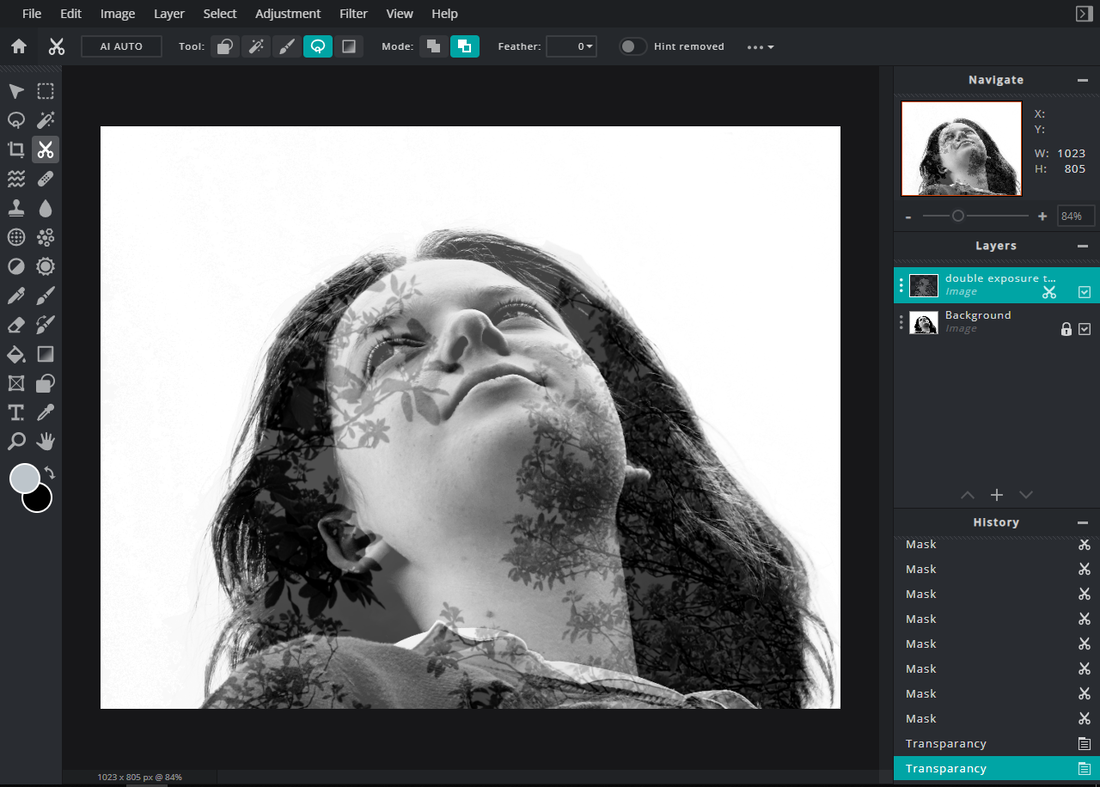
Step 3 - To further the effect, I changed the image filter to 'Multiply' to create a softer overlay on my image.
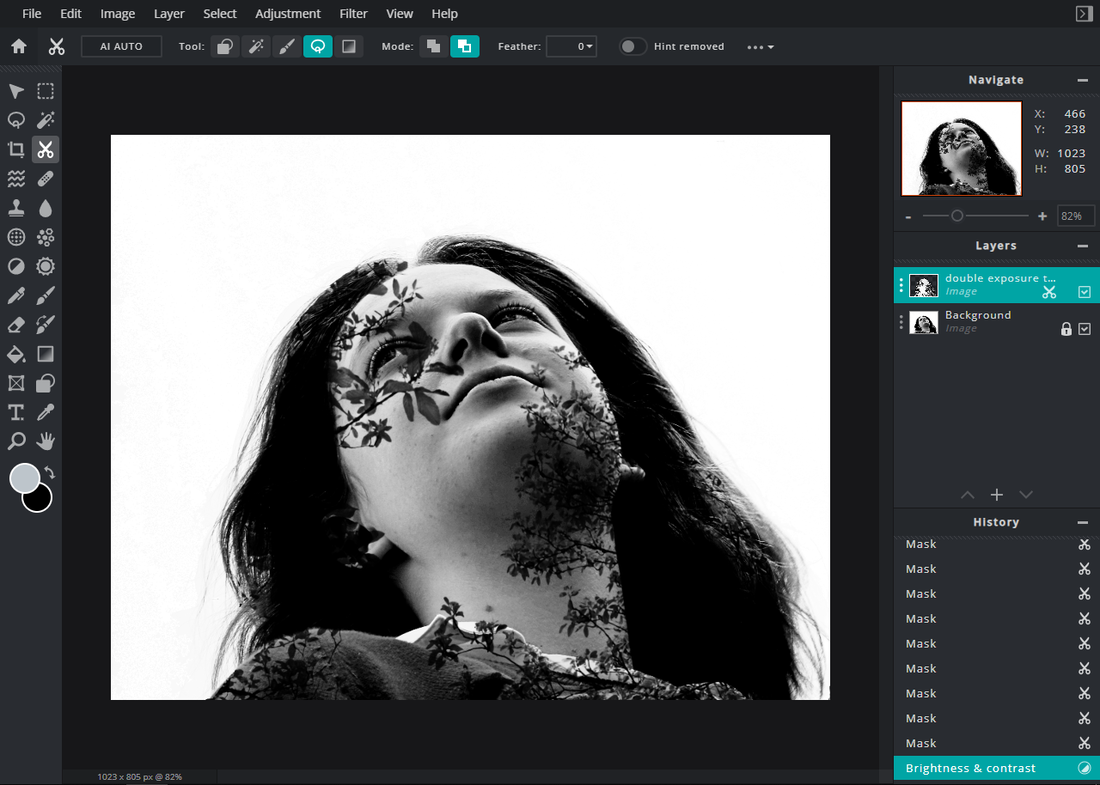
Step 5 - I then started removing different sections of face with the drawing tool, creating different overexposed sections of light.
|
Step 2 - Then, I overplayed my second exposure and masked the sections that didn't fall on my face. I then desaturated the image and increased the highlights and shadows once again.
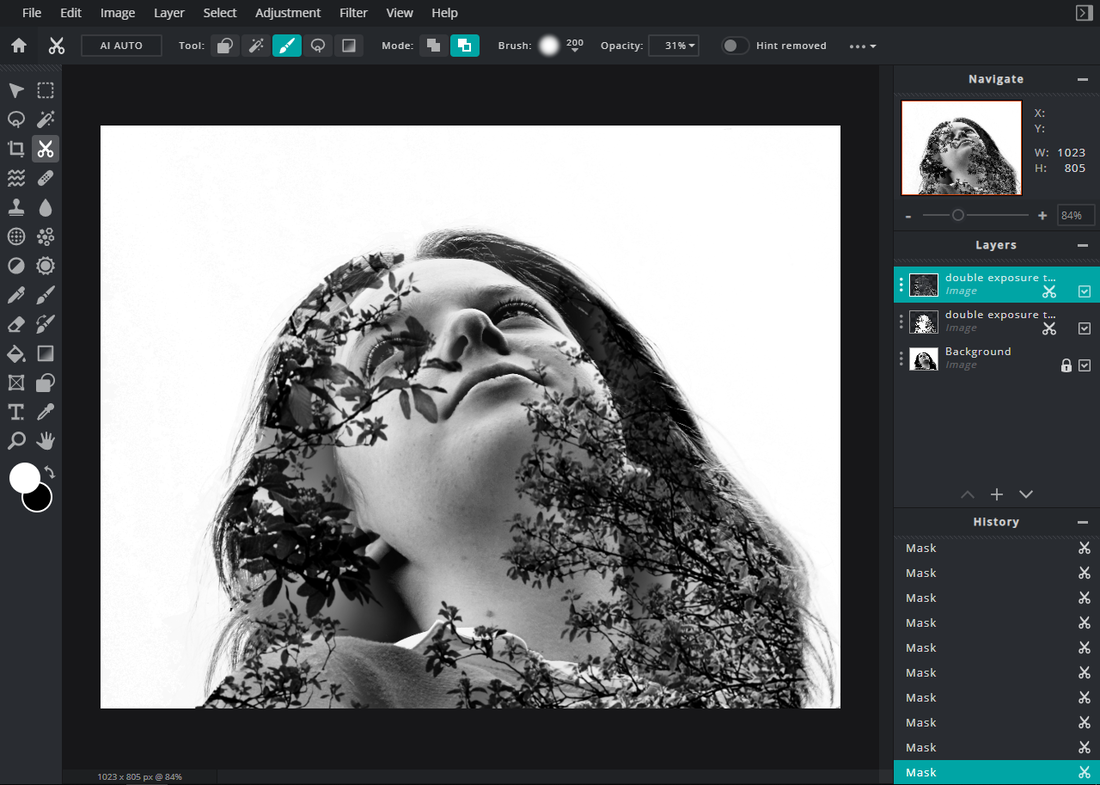
Step 4 - I then duplicated the overlay and changed the filter to 'Screen'. I then masked areas to extenuate different features.
Step 6 - The final image. Any features I didn't like were changed and edited.
|
final edits
|
|
best edit

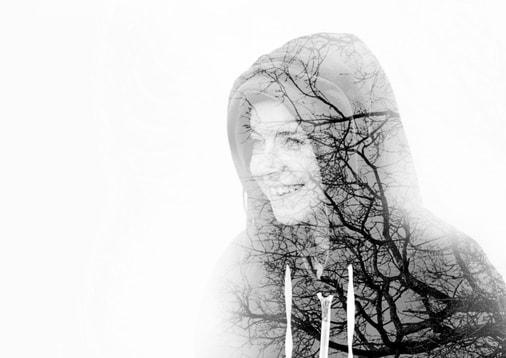
I really like this image because of many reasons. Firstly, I like how seamless the edit apears. The overlay of the leaves blends into the background, achieving my goal of blending human and nature. I also like the harsh bright light, bleeding through the gaps of the leaves. Another reason I like this edit so much is the gentle colours, rather than hard contrast between black and white. This low contrast creates a calm image, something I was striving to achieve.
shutter speed work
|
What is Shutter Speed and Blur in Photography?
Shutter speed is the length of time the shutter of a camera is open. The longer the shutter is open, the more light being let in. However, the sooner the shutter closes, the less light let in. Shutter speed is also used to create an intentional blur effect or ghost effect in the photograph. Using this skill, I will be making different pastiches to develop my photography skills further in my portraiture and identity project. First, we looked at long exposure, then we explored motion blur and then finally we looked at light drawing. |

|
|
|
Slow Shutter Speed - creates a sense of movement, blur or dynamic motion
|
|
|
Fast Shutter Speed - catches crisp details and freezes them in time
Long exposure
|
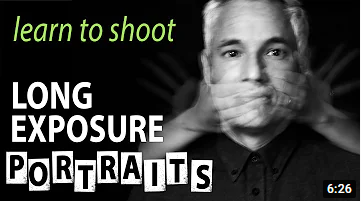
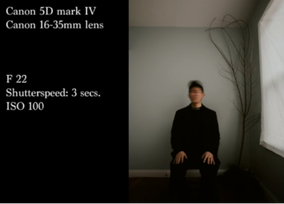
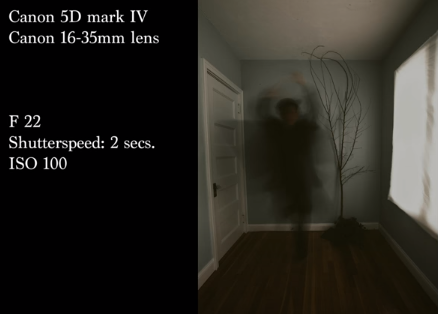
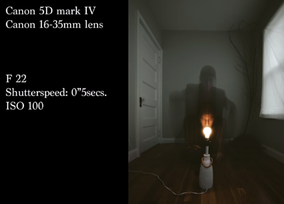
What is Long Exposure in Portrait Photography?
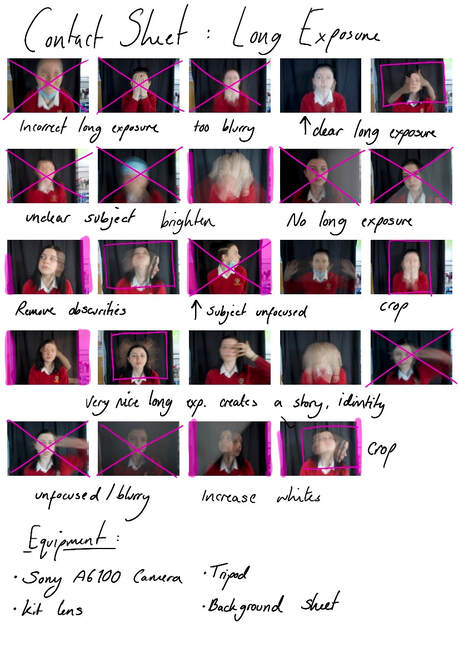
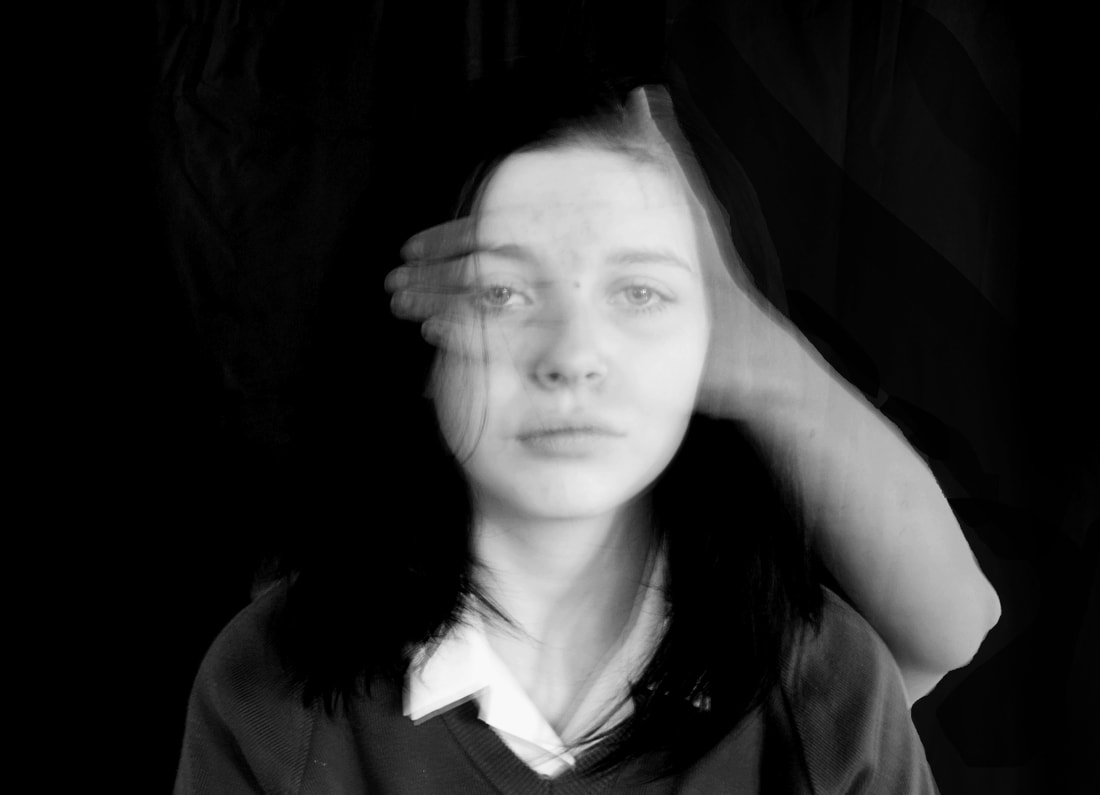
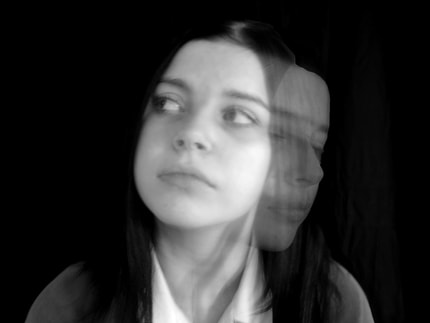
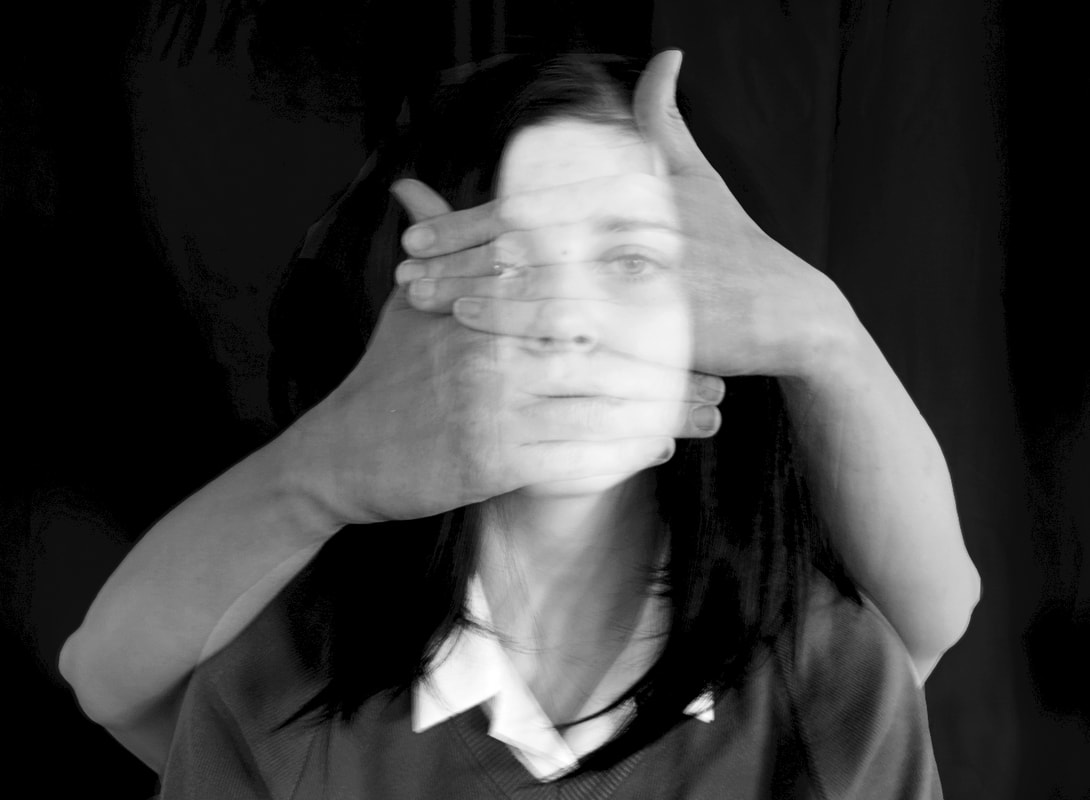
Long exposure involves having a very long shutter speed. Using this long shutter speed, photographers can create a ghostly effect. This involves moving hands, faces, bodies etc in or out of frame, not fully exposing them so they appear as ghostly. Equipment involves tripods, remote shutter control, a background and another person to help you with the ghost effects. The sitter must stay as still as possible to make sure the image comes out clear and well exposed. |
f/14 - 3 seconds - ISO 64
|
f/11 - 3 seconds - ISO 64
|
f/10 - 3 seconds - ISO 64
|
Shoot plan
In this shoot, I will need a camera, a model, a background (preferably black/dark) and a tripod. I could have also used a shutter button if I was taking a photo of myself. I will used f/11 with a shutter speed of 3 seconds in order to capture the delicate movements of the model. I will also use a low ISO to make the image moodier and ghostly. Optionally, I could use a black and white filter on my image.
contact sheet
editing process
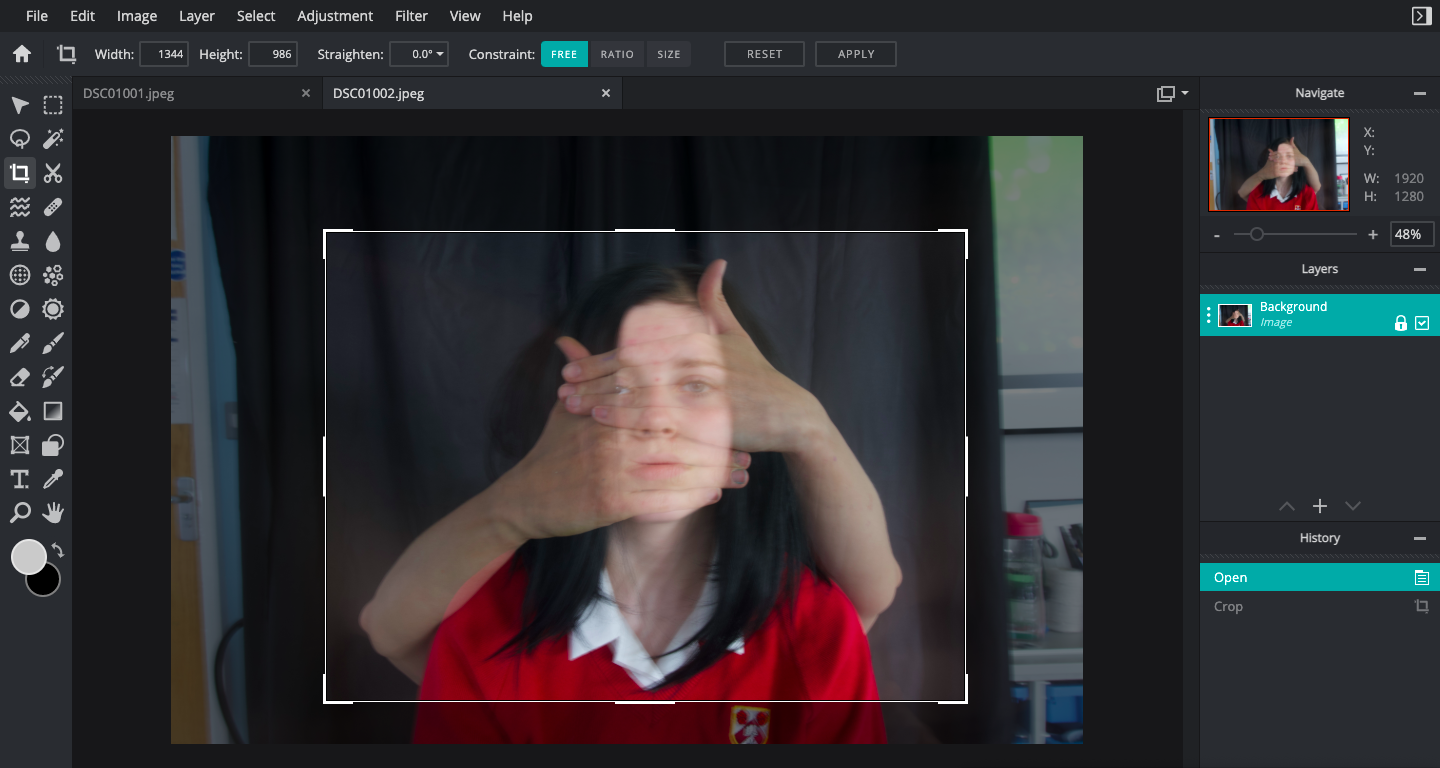
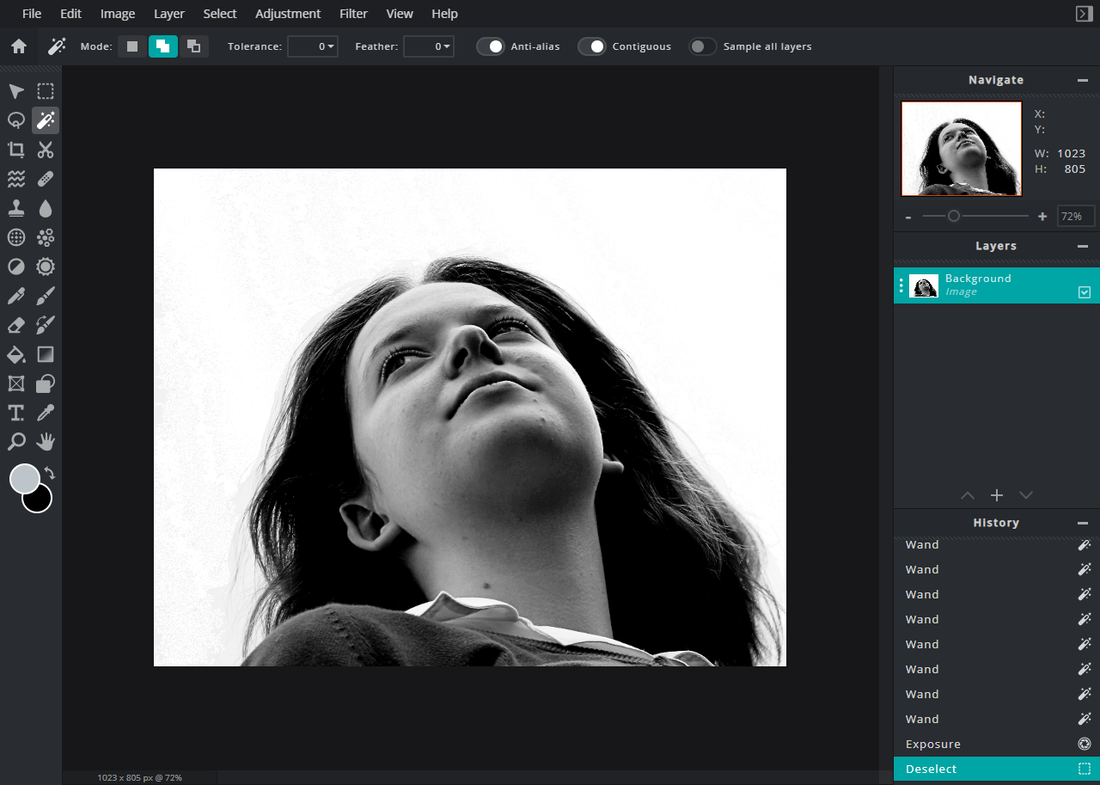
Step 1 - First, I imported the image into the free editing website, Pixlr and cropped the photo to size, removing anything unwanted from the background.
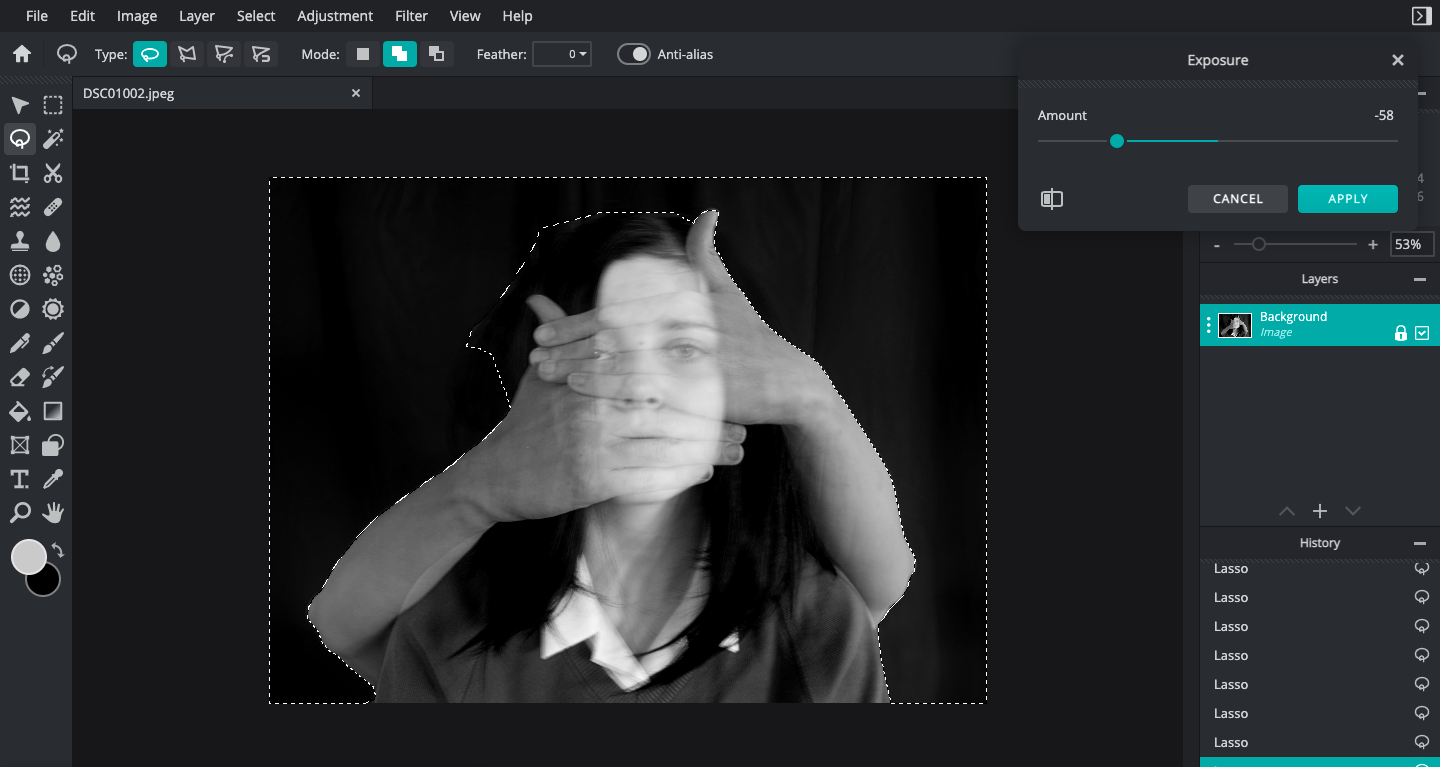
Step 3 - Next, I selected the background of my image, avoiding any parts of the subject that I don't want to underexpose.
|
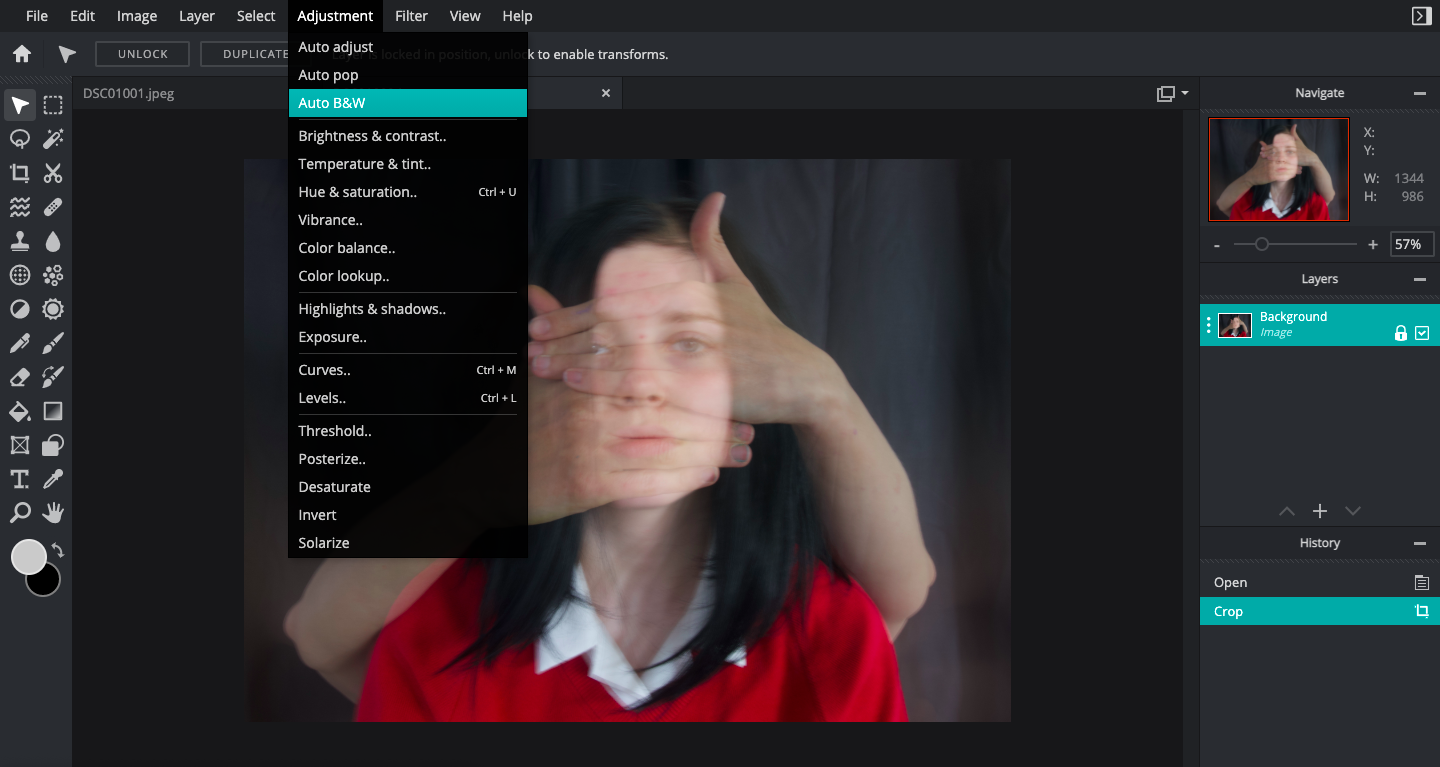
Step 2 - After cropping the image, I used the 'Auto B&W' function under the Adjustments tab. This function is helpful as it saves time.
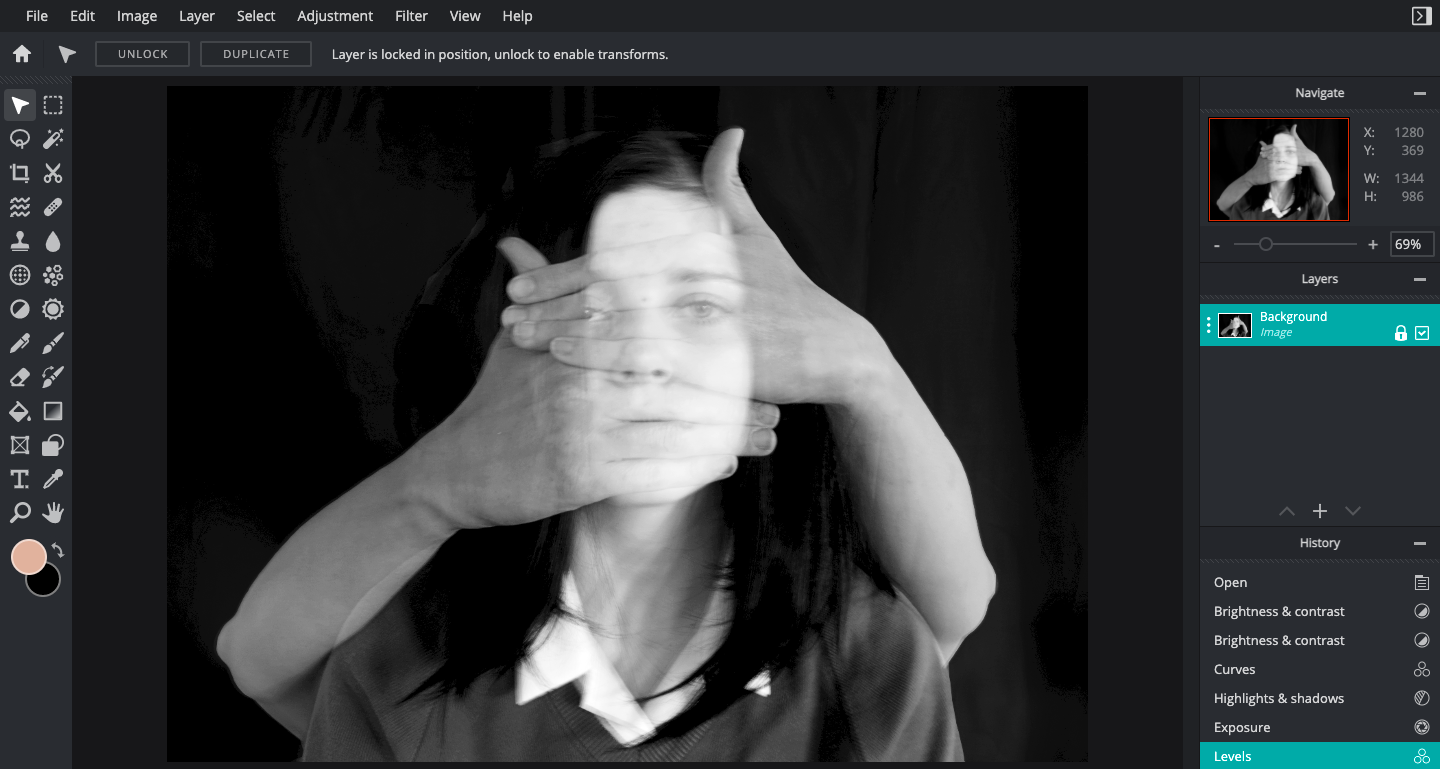
Step 4 - Finally, I made some adjustments to the image overall to create the look that I wanted.
|
best edits
|
|
|
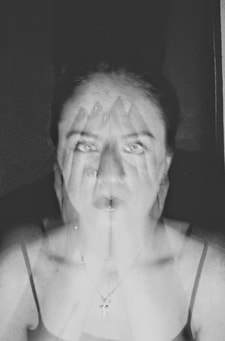
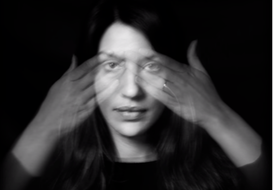
I feel the mood expressed in this image is one of the reasons why I believe this image is successful. The darkness surrounding the subject creates a tight and isolated feel. It also conveys a feeling of suffocation and uneasiness due to the ghostly hands covering the models face. These hands help express identity, symbolising a mask or a barrier up against the camera or other people. This visual articulation reveals many different aspects of an image without using words. Overall, I feel this image was successful, although next time I will try and take better focused images. |
motion blur
|
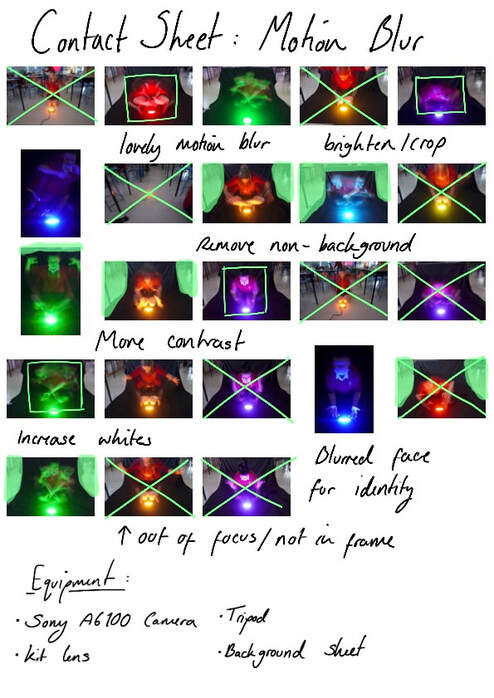
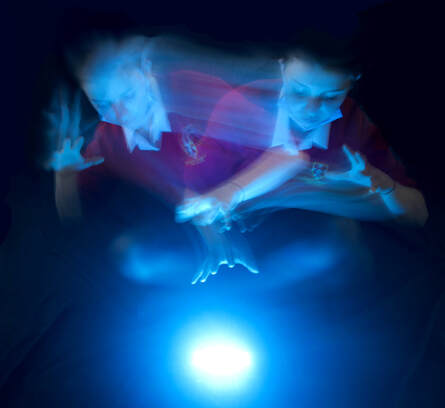
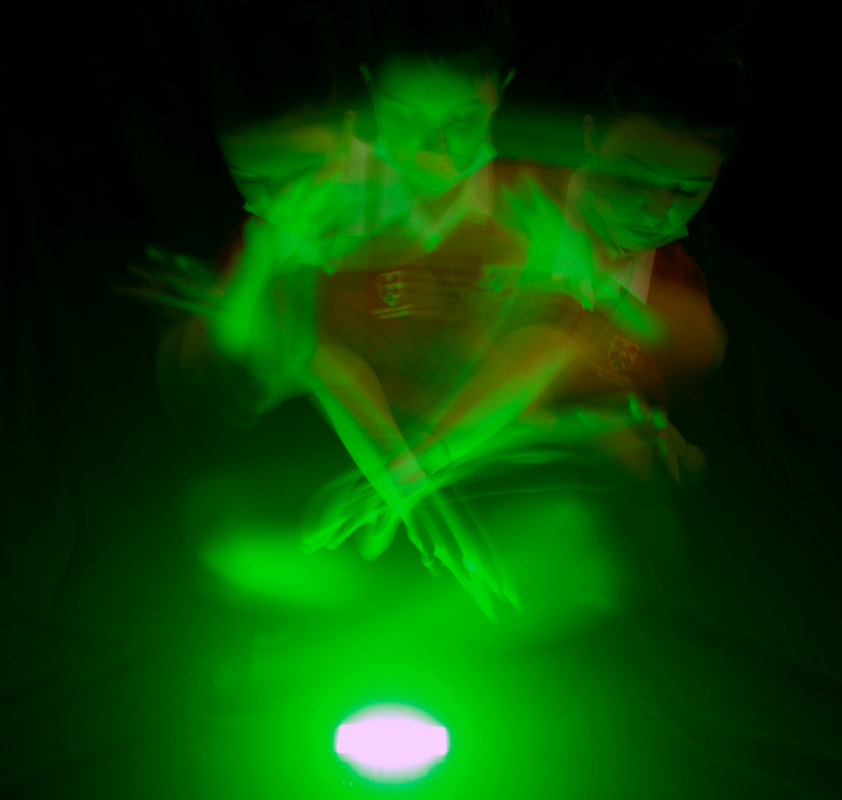
What is Motion Blur in Portrait Photography?
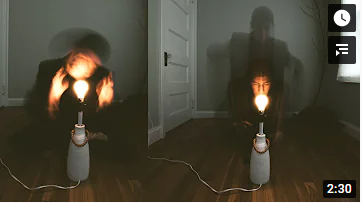
Motion blur is when a person purposely blurs the subject, creating the feeling of movement in an image. In our shoot, we used light to enhance the image and highlight the subject, separating them from the background. To balance our images, we used a tripod and a timer to avoid any extra camera shake. We also used a bright light. I instructed the sitter to move form 2 or more positions to create motion and flow in my photographs. Most of my images came out blurry, however some look very effective. |
f/22 - 3 seconds - ISO 100
|
f/22 - 2 seconds - ISO 100
|
f/22 - 1/2 seconds - ISO 100
|
shoot plan
In this shoot, I will be using motion blur to achieve a feeling of movement and motion in my images. To create my set, I'll be using a black backdrop and an LED light to use as a light source. I will also need to use a tripod in order to stable my images to avoid unwanted blur. I will use an ISO of around 100/200 as the image will be naturally dark, I will also be using a shutter speed of around 3/4 seconds to give enough time for my model to move. As for my aperture, I will leave it fairly open at around f/22 as I don't need a specific focal point. After my shoot I will edit my images by removing unwanted background/re-colouring some of the light.
contact sheet
editing process
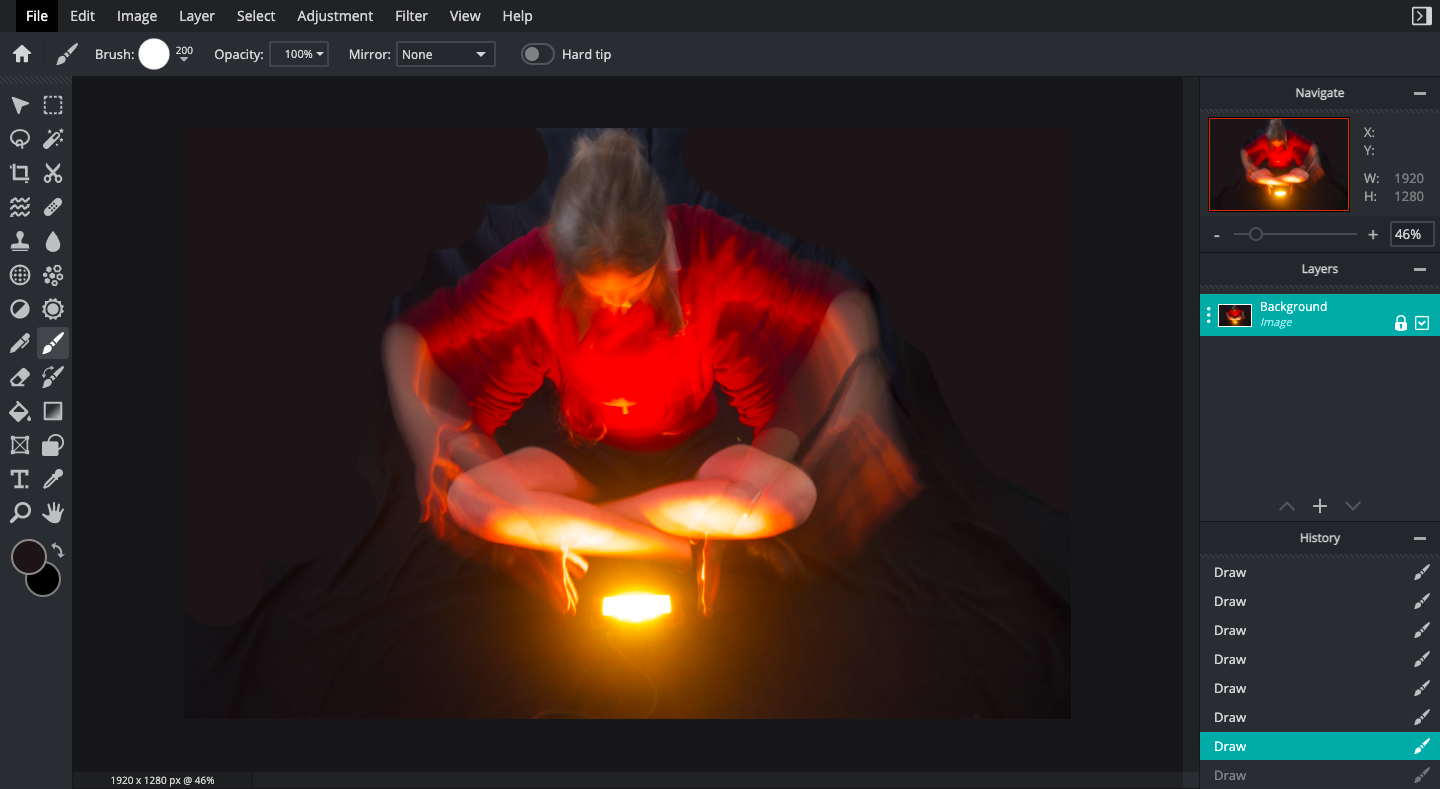
Step 1 - Firstly, I used the 'brush' tool to remove any obscurities from the background.
|
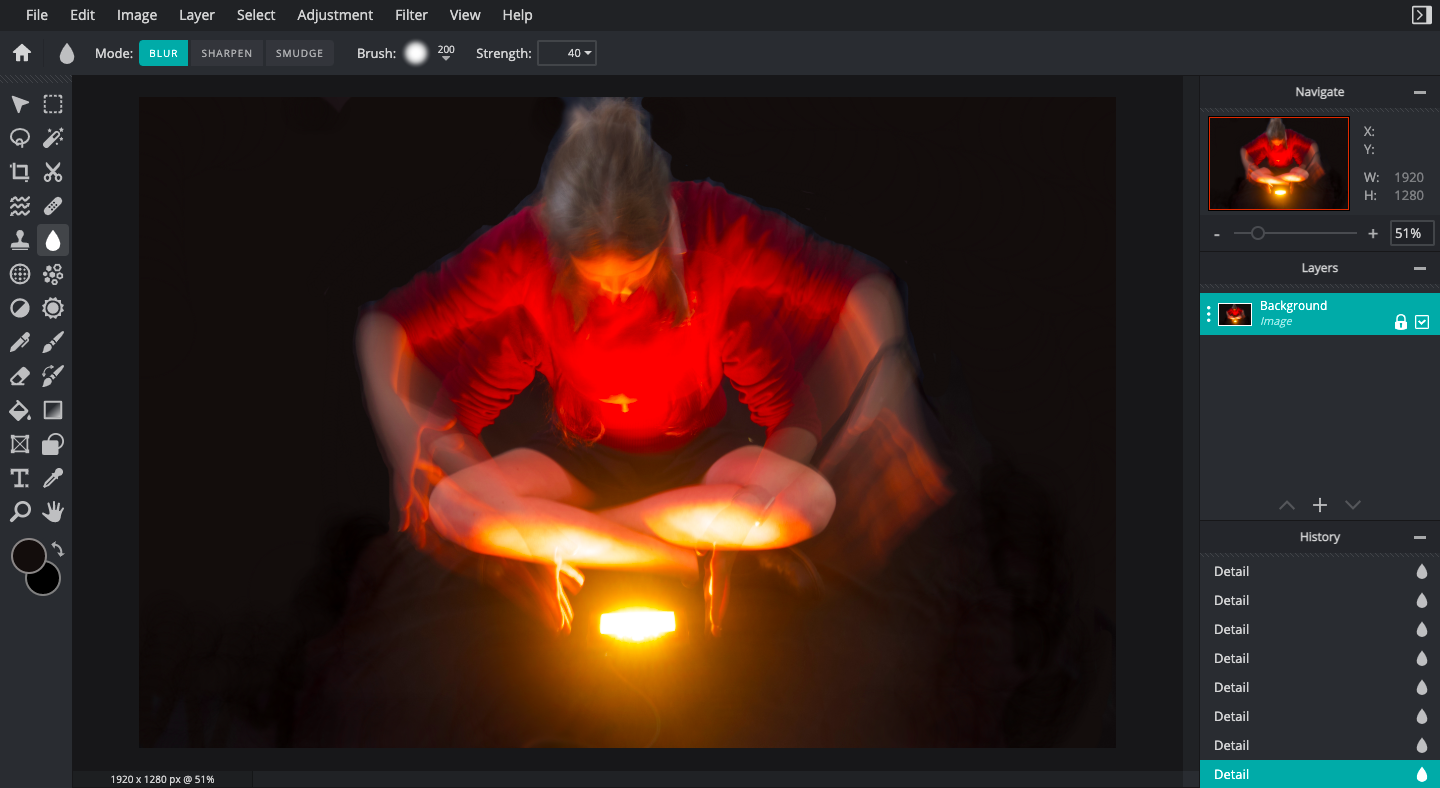
Step 2 - Next, I used the 'blur' tool to blend the image and the drawn on section to create flow in the image, looking natural.
|
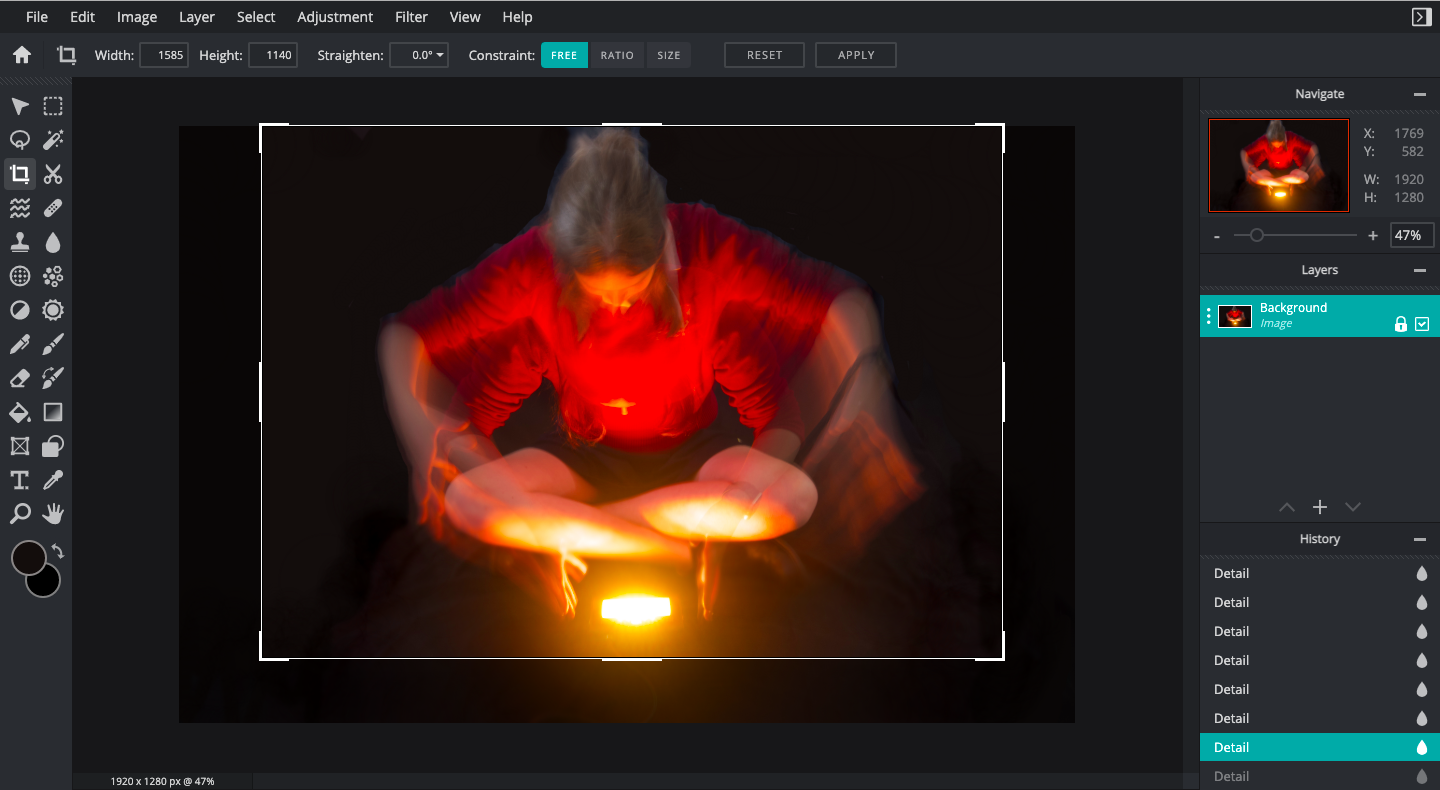
Step 3 - Afterwards, I cropped them image to fix the rule of thirds so my subject was in the centre of the image.
|
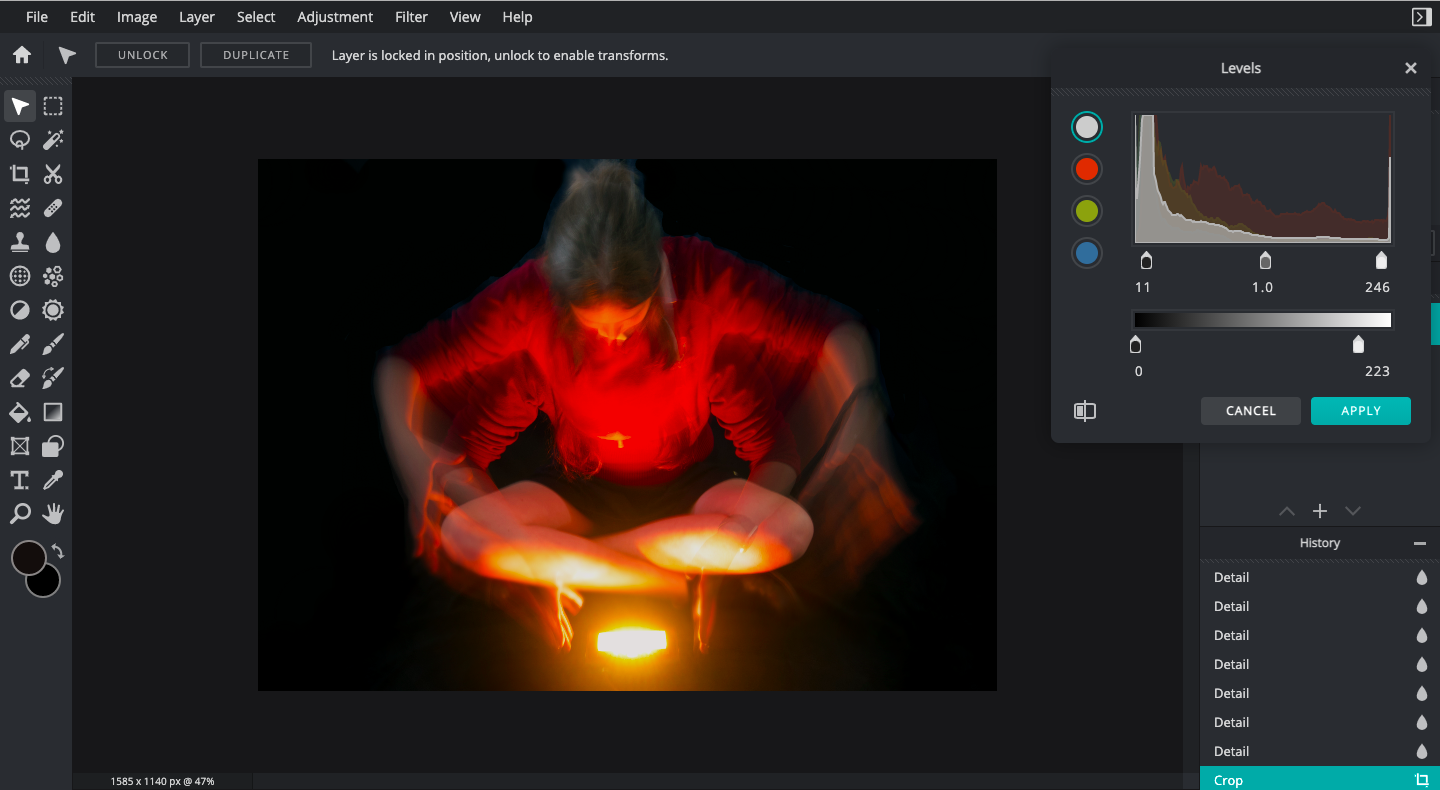
Step 4 - Finally, I used the 'levels' tool to create depth and change the colours, making a moodier image.
|
best edits

|
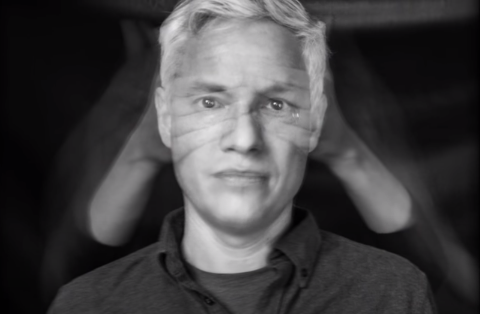
Identity is expressed through the fast motions of the hands moving away from the light source. This image tells a story of someone who's life is moving fast and they cannot quite grasp onto their goals, causing them to fade from the person they want to be. I also like how the sobject in the picture seems to split into two, portrayed by the second set of hands. This could represent the split personality of trying to be the person you want to be and the person you are in reality. Overally, I really like this image as it exposes a non-verbal discourse between the same person on who they want to be and what they can achieve. Next time, I'd like to try and make the image clearer and make sure the model is much stiffer in the movements, creating a crisp image. |
light drawing
|
What is Light Drawing in Portrait Photography?
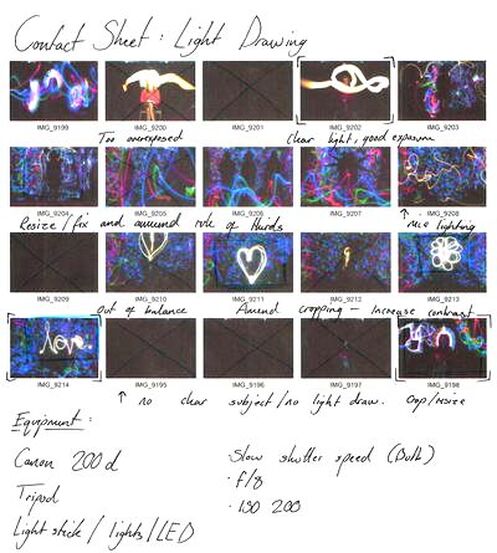
Light drawing is achieved when a slow shutter speed and lighting are used together to create a picture, or drawing, out of light. For our shoot, we made the room as dark as possible and manually focused the camera on the sitter or subject before turning the lights off, avoiding the auto focus. We then moved across the photograph while the shutter was open, creating different patterns around the sitter or subject using LED's and light sticks. We managed to create some very interesting shots. |
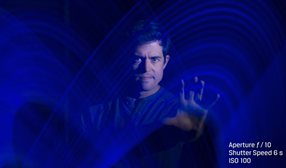
f/10 - 6 seconds - ISO 100
|
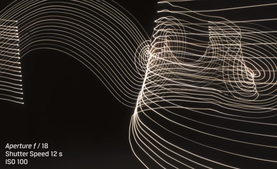
f/12 - 12 seconds - ISO 100
|
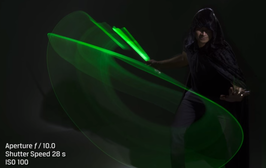
f/10 - 28 seconds - ISO 100
|
shoot plan
For this shoot, I will be creating drawings through light. It is crucial that I have a completely dark room for this shoot as I don't want any other light affecting the outcome of my photographs. Furthermore, I will need some light sticks and a tripod. My shutter speed will need to be very long to create large, detailed images. My iso will remain 100 and I will use an aperture of around f/12. After this shoot, I will edit my images, removing any extra unwanted light and playing around with the colour of my light.
contact sheet
editing process
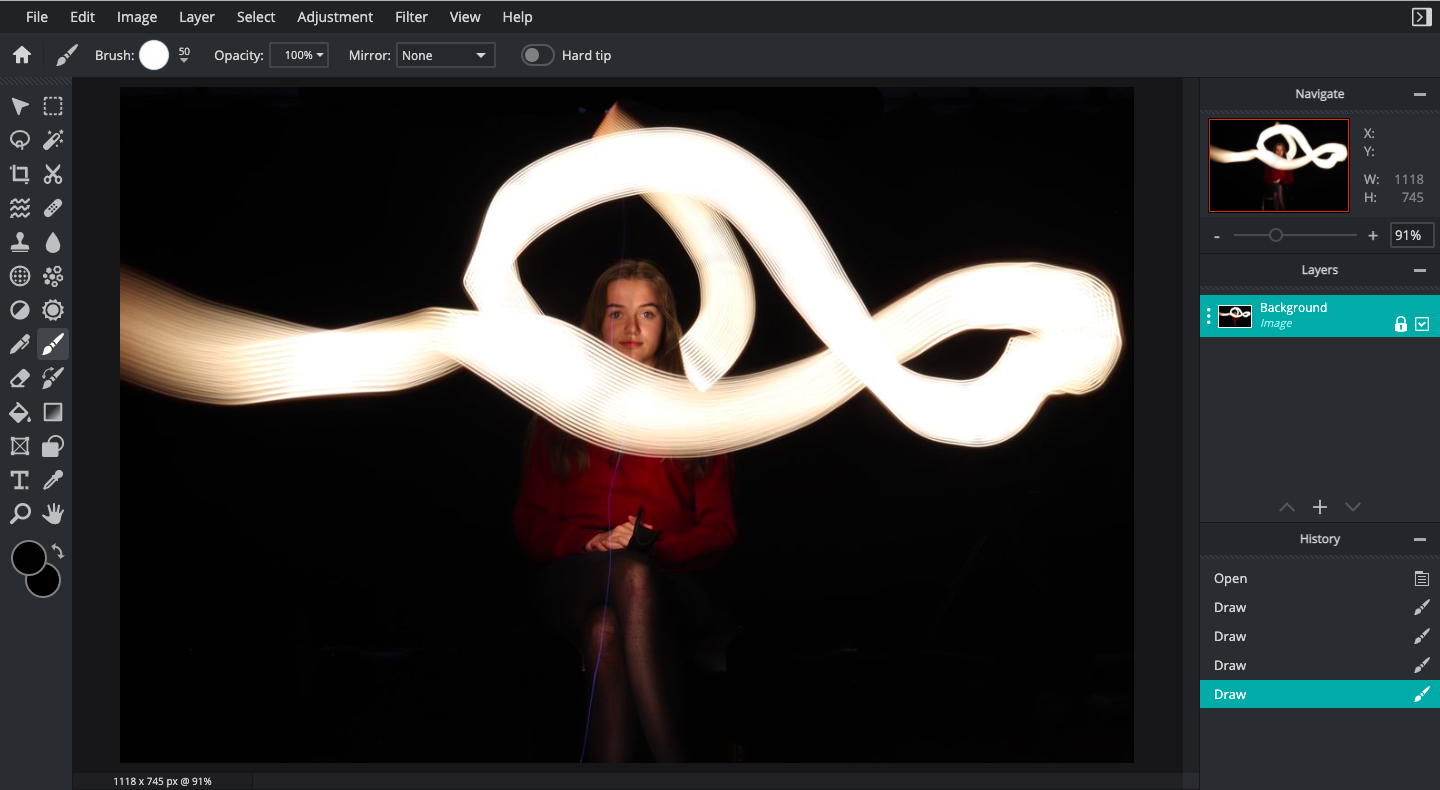
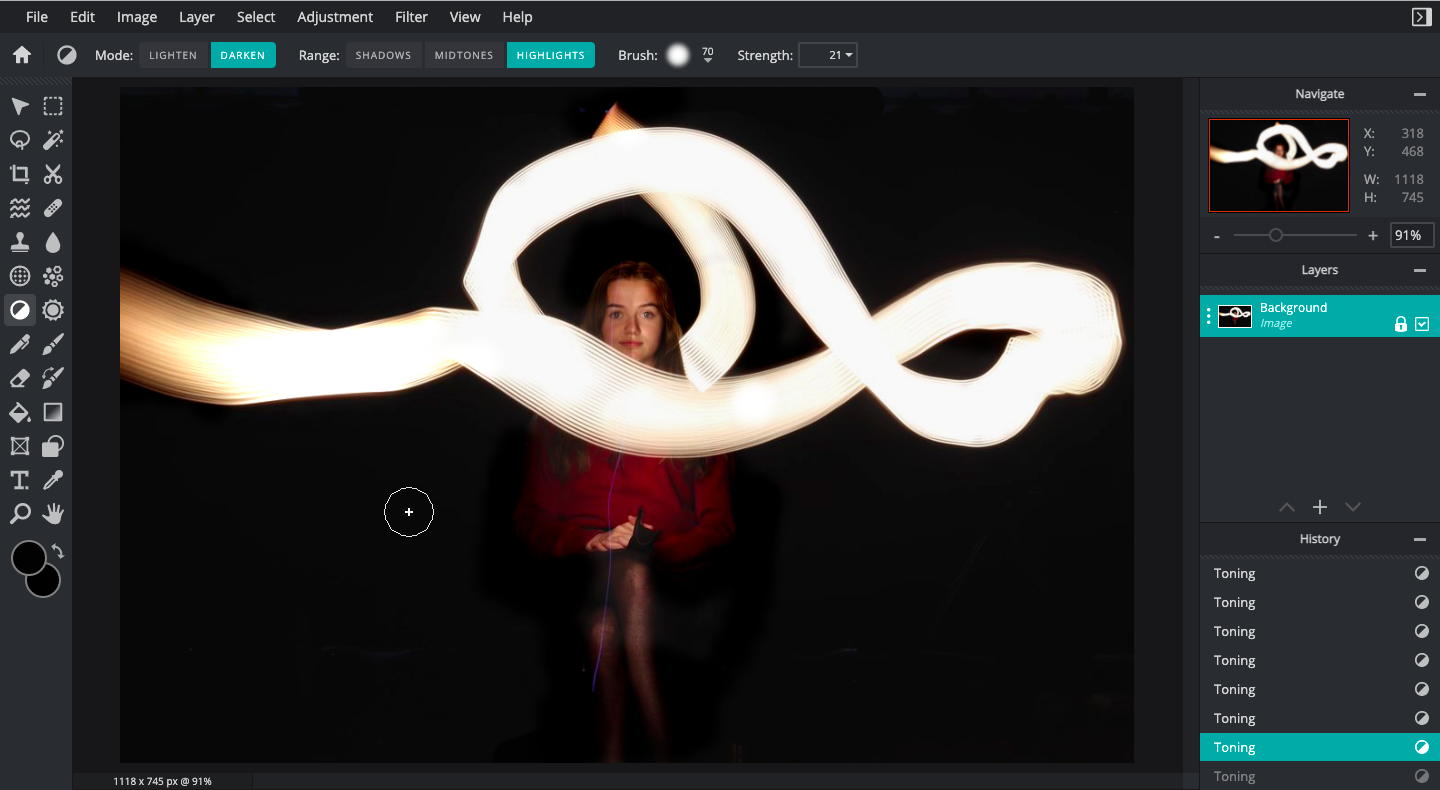
Step 1 - Firstly, I removed all obscurities using the 'draw' tool, simply drawing over any obscurities. By doing this, my image looks much clearer and professional.
Step 3 - Next, I used dodge and burn to create a richer, brighter colour where the light drawing is.
|
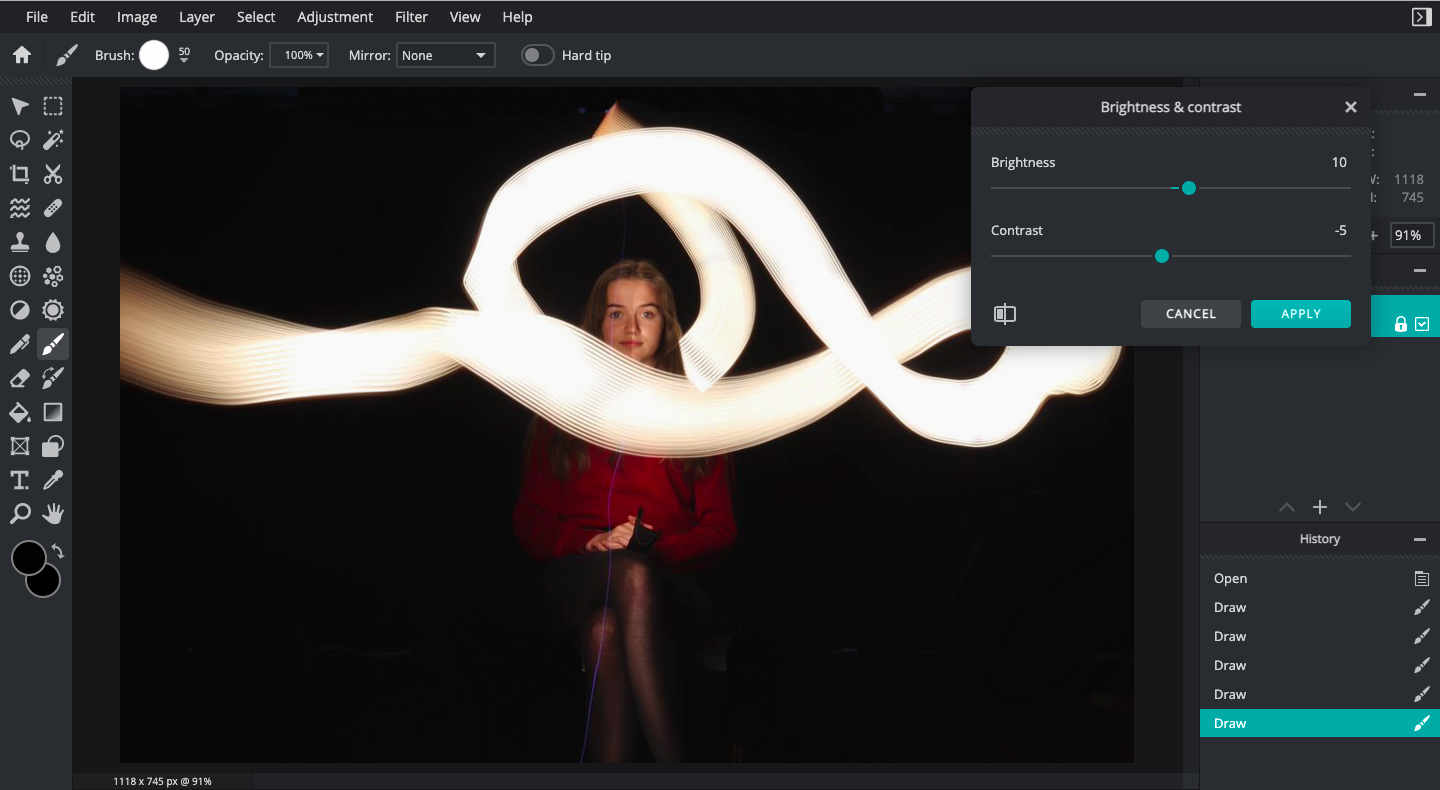
Step 2 - Secondly, I corrected the brightness and contrast to expose the model more, making her stand out against the empty, black background.
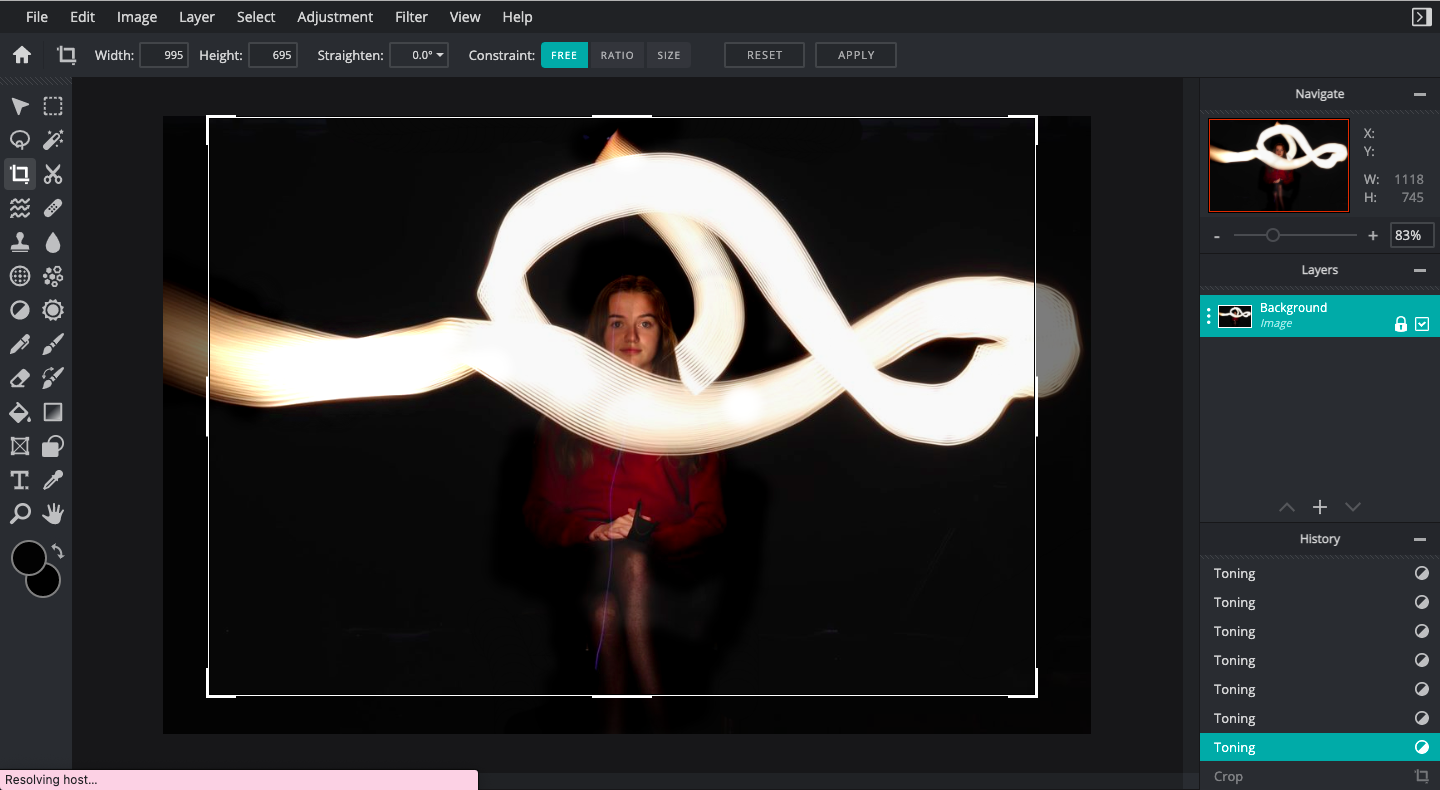
Step 4 - Finally, I cropped my image appropriately using the rule of thirds as a guide. After this step, my image was completed.
|
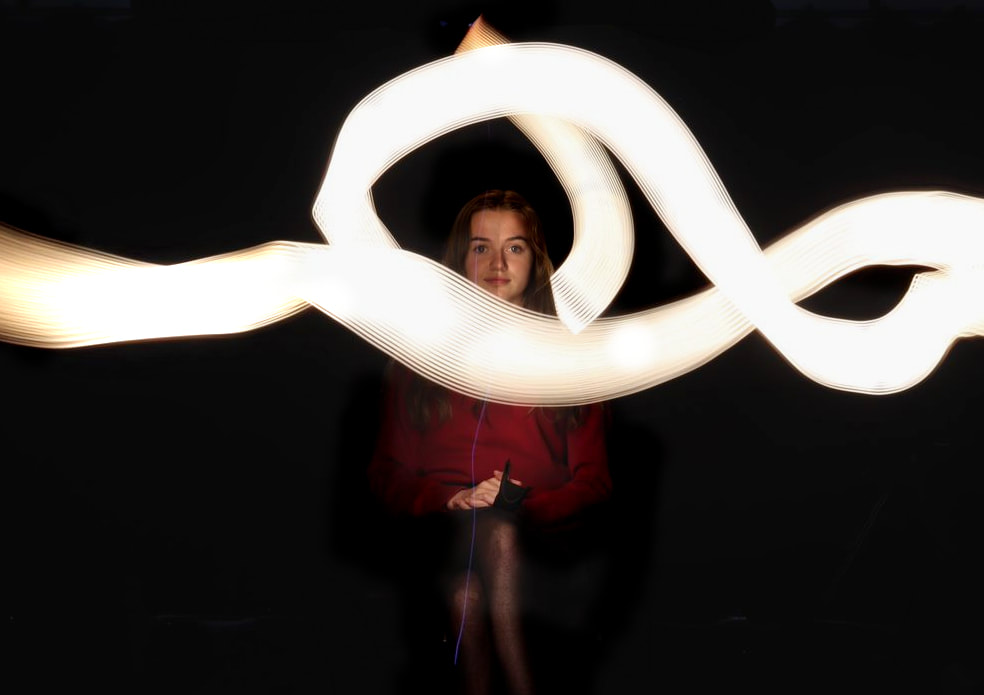
best edits

|
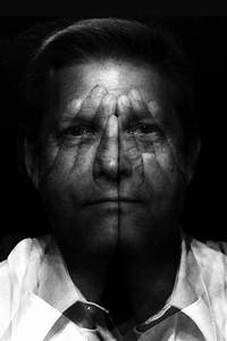
I really like this image because of the negative space and contrast. The mood is very claustrophobic as the light drawings around the models face seems like a barrier or cage between the viewer and the model. This could tell a non-verbal story of someone building a barrier between themselves and other people. The calm face of the model shows the contentedness they have with locking away their true emotions and personalities from the people they are close too. |
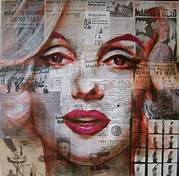
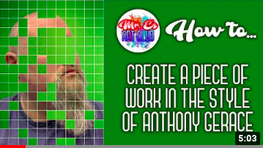
Anthony Gerace - Artist Investigation
"Collage is, traditionally, a medium resistant to systems. The overarching conceit of the form, that of taking images of the past and reconfiguring them into new artworks, seems counter to the idea of seriality, either mathematical or geometric or aesthetic or conceptual, and impossible to systematise." - Anthony Gerace
|
|
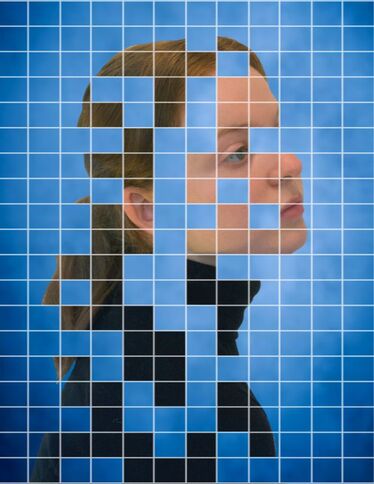
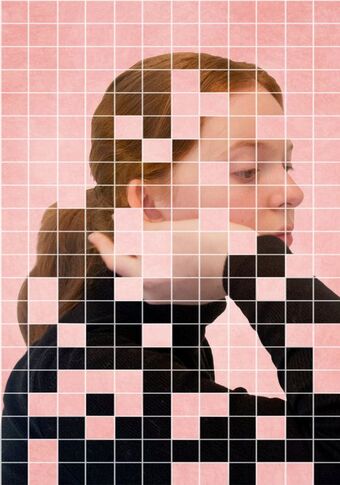
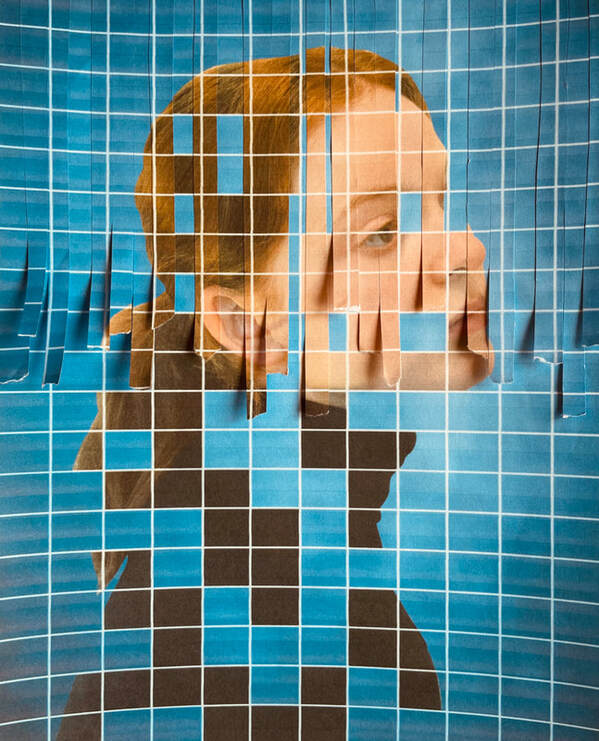
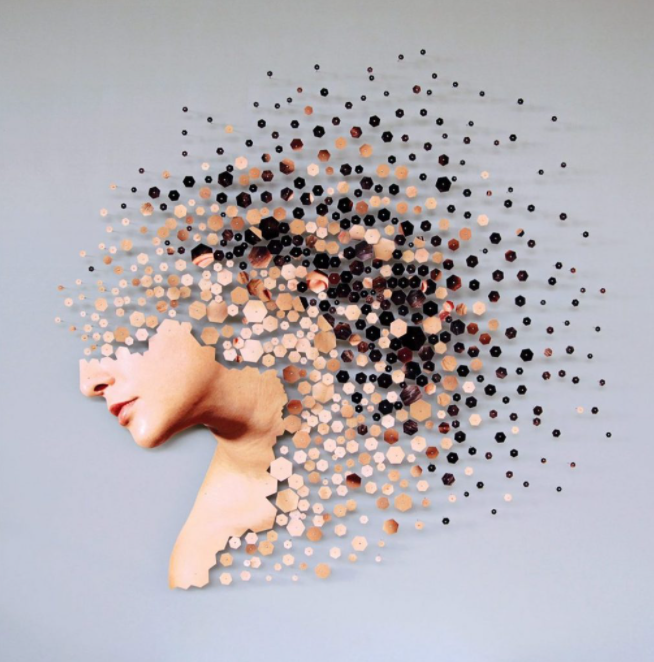
Why this artist?
I chose Anthony Gerace because their photography stood out to me when researching for this project. I love how the tiles cover up different parts of the subject, obscuring their features and creating mystery surrounding who they are and their life. Who are they? Gerace is a Canadian artist, graphic designer and photographer who currently resides in London. In the past, Gerace worked with musicians to create album covers and worked with The New York Times and The Guardian. His work often revolve around time and how things age, creating new from old. Why this quote? This quote really shows how Gerace sees his artwork and how collage brings different mediums and skills together to create a new piece of art. The quote also highlights how Gerace uses geometrical and unnatural shapes to compliment human forms. Website: https://a-gerace.com/ |
how will i emulate their work?
|
Due to the mature of my images, I will be doing a lot of editing on them. The subject of these images were originally completely different artworks created in around the 50s/60s, however Gerace edited them and created new works. However, I will be taking a range of images of my or a models face using basic lighting, e.g fill and back light. I will then use an editing program to remove the background and create the grid effect. From there, I can cut out different blocks. I may further edit my images, creating a grainier and warmer effect, reminiscent of 50s/60s style photography.
|
|
Photographic techniques - portraiture photography

|
Portraiture is the genre of photography where a photographer attempts to capture someone's whole person in a single photo, breaking down a mask. Portraits are not only restricted to human faces, but it can also be body parts and animals. One of the key components of photography is using lighting to your advantage to accentuate certain features of the model. Lighting in different positions can pull your subject out of the image, bringing depth to an image. Equipment such as a tripod and shutter button are brilliant for photos with a long shutter speed as they reduce camera shake. Different lenses can create different moods. For example, a 35mm lens creates a sharp image with detail remaining clear even in the background. Lenses like 50mm and 85mm blur the background, bringing attention to the model. These two lenses are regularly used in portraiture as they bring atmosphere to a portrait.
|
shoot plan
I have drawn inspiration from the artist Anthony Gerace because their artwork focuses on the themes of identity and lack of it. I plan for the shoot to take place during the day because the natural light would complement the overall shoot. The props I intend to use are some desk lights and a tripod because in order to take a good photo, the camera must be still and the subject well-lit. The lighting conditions I will require would have to be close to warm studio lighting. I will experiment using high key because having a light background makes further editing on Photoshop/Pilxr. My subject will be front and side/back lit, the front from a window and side/back from an artificial light. The lighting will be mainly natural light because natural light compliments the features of the human face and body, it also resembles the dated style of the subjects portraits. I will adjust the white balance on my camera to daylight.
I intend to shoot with a Sony a6100 using a kit lens (16mm – 50mm) on a tripod because this lens produces very clean images, and the tripod will reduce excess camera shake. When considering exposure, I intend to shoot with a relatively shutter speed of 160. I intend to use a large aperture f/5 for a small depth of field, removing any imperfections in the background and focusing on the subject. I will also use a slow shutter speed so my image will be properly exposed. Following the shoot, I plan to digitally edit my image using Pixlr in order to remove the background and apply further editing. I'll then apply a grid shape to the image and then recolour a few squares to recreate Gerace's style. As Pixlr is a very capable software, I am able to edit a range of details such as the exposure, contrast and colour retouches.
I intend to shoot with a Sony a6100 using a kit lens (16mm – 50mm) on a tripod because this lens produces very clean images, and the tripod will reduce excess camera shake. When considering exposure, I intend to shoot with a relatively shutter speed of 160. I intend to use a large aperture f/5 for a small depth of field, removing any imperfections in the background and focusing on the subject. I will also use a slow shutter speed so my image will be properly exposed. Following the shoot, I plan to digitally edit my image using Pixlr in order to remove the background and apply further editing. I'll then apply a grid shape to the image and then recolour a few squares to recreate Gerace's style. As Pixlr is a very capable software, I am able to edit a range of details such as the exposure, contrast and colour retouches.
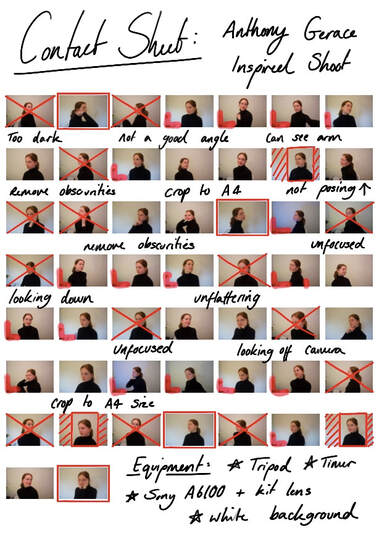
COntact sheet
Digital edits
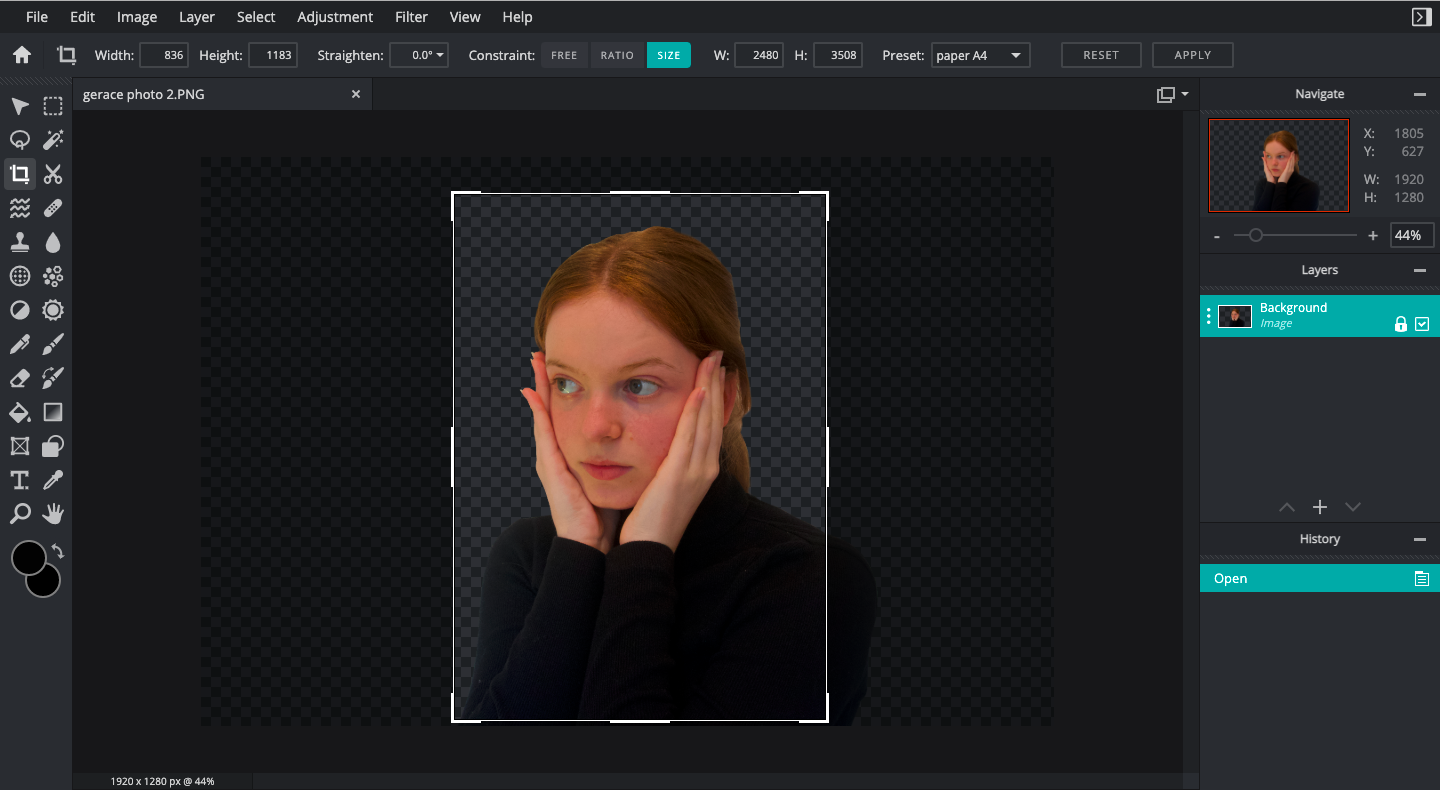
Step 1 - I first cropped the image of the model to A4, moving it around to follow the rule of thirds.
|
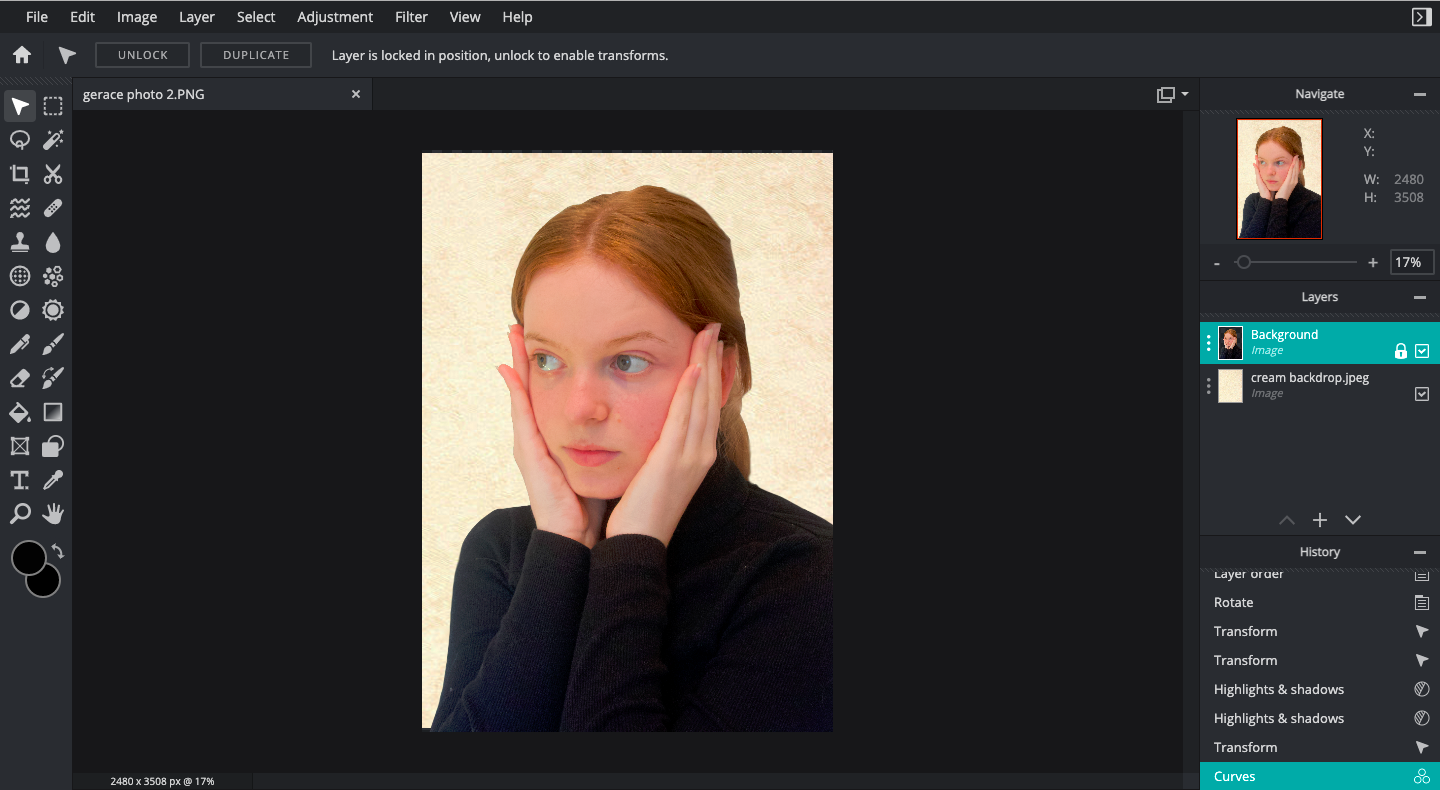
Step 2 - Next, I added neutral background. I edited the model to match the background so it doesn't look out of place.
|
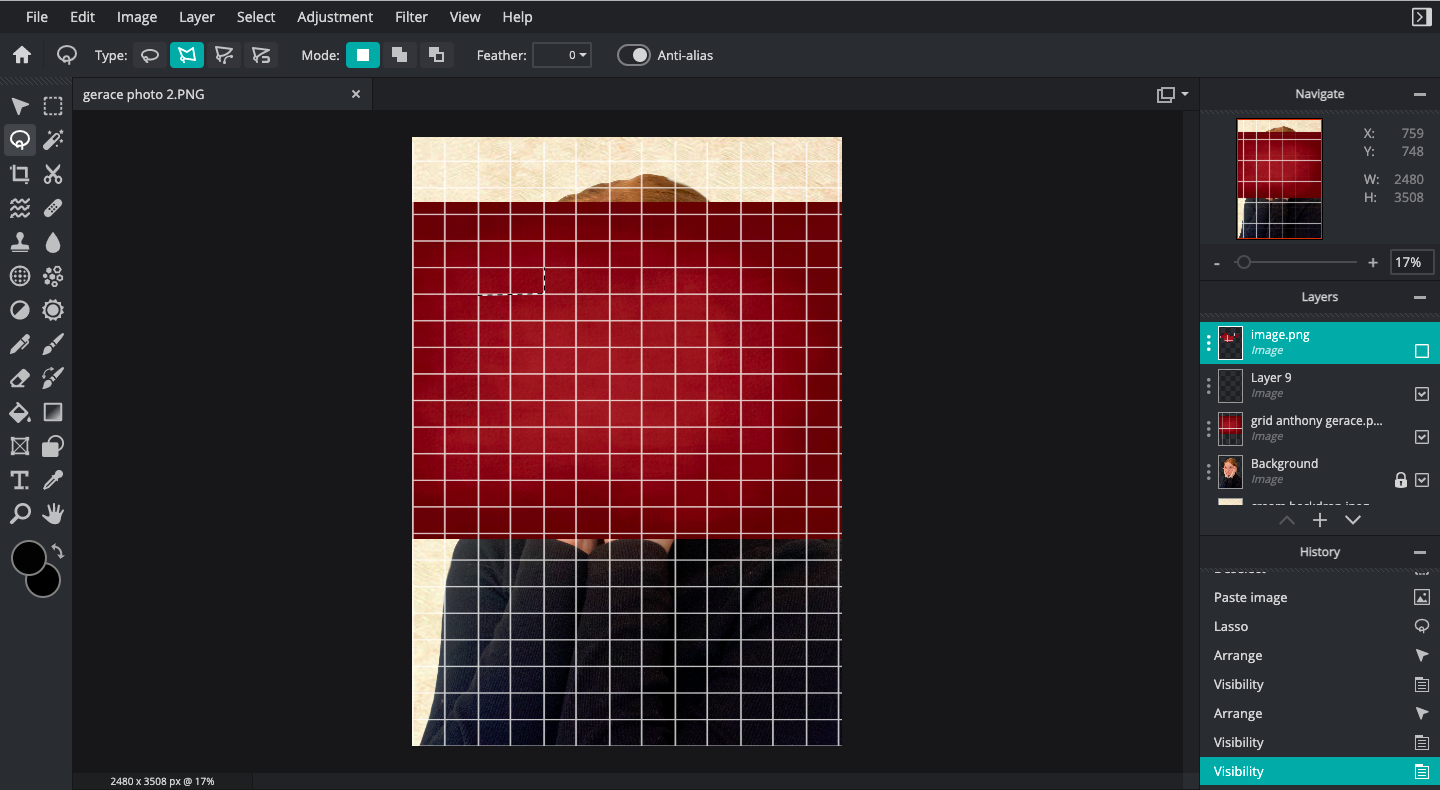
Step 3 - Afterwards, I added the grid and red background and cropped it into a pattern that could cover the models eyes.
|
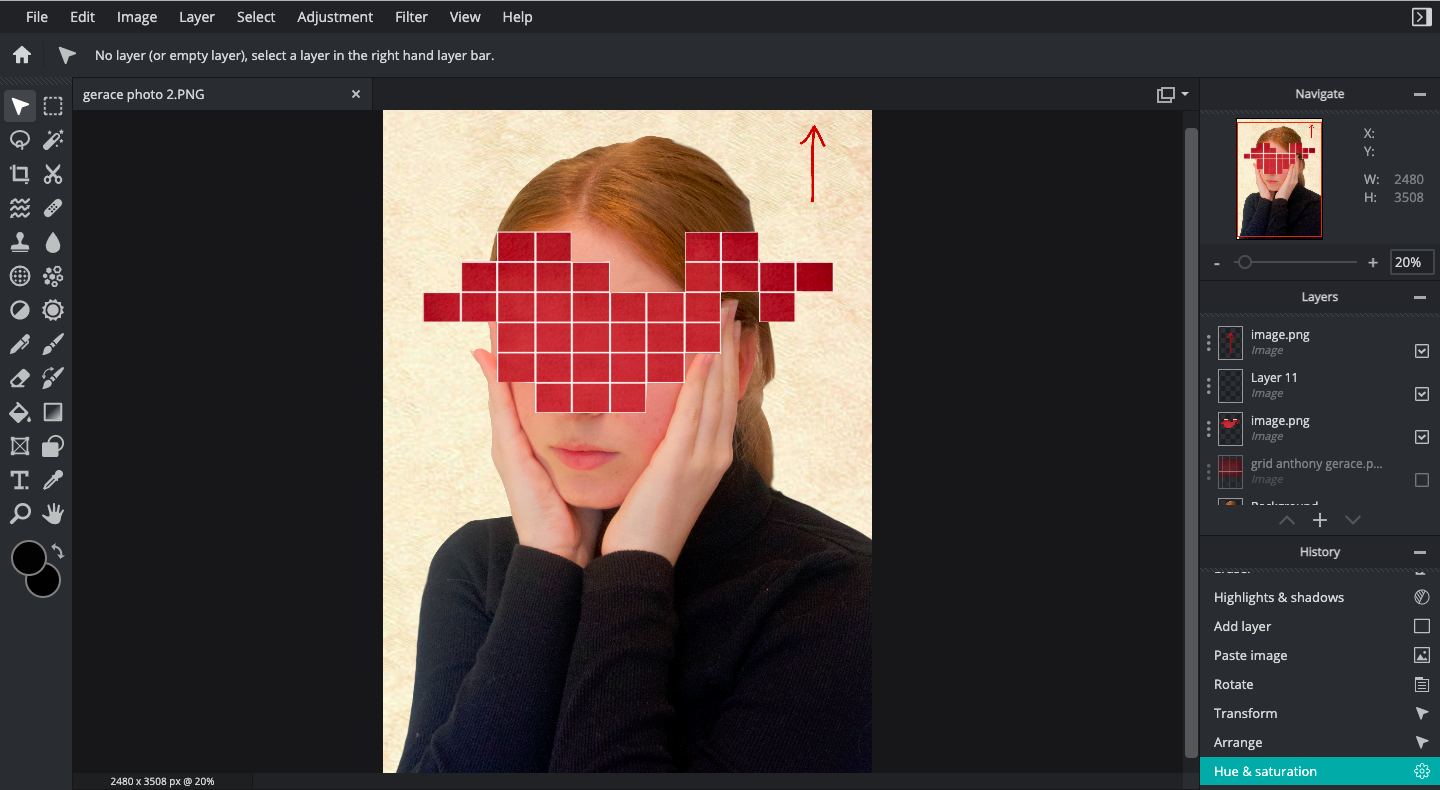
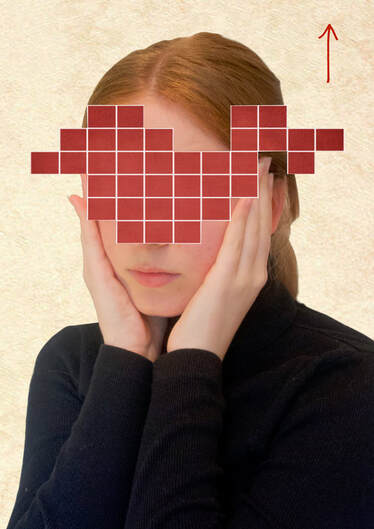
Step 4 - Finally, I edited the whole image. I also added an arrow in the top right corner, matching the source image.
|
BEst edits
I really like this image because I feel I managed to do a really nice edit. The overall edit looks good and the foreground matches the background. I also like the red tiles covering the eyes and nose of the models, tying in very well with identity as the obscurity leaves the models face up to the imagination. The mood of this portrait is very bright on first view, however on a deeper inspection, it seems darker. The hands appear to be holding the models head up, relying on themselves for support.
|
|
|
This is my favourite out of the three edits because I really like the contrasting colour scheme of the cream and white. I also like that the grid doesn't cover the whole of the image, creating a more abstract and unique image without a guide. I like how the editing turned out, the face looks bright however not too saturated. I also like that the background is still clear and unblurred, unlike the other two edited images. The contrast of the red and white also brighten and bring out the warm reds of the face. Furthermore, I also like how the eyes are obscured by the red tiles. It adds a further level of confusion and obscurity to the image, making the viewer question what is beneath the tiles. The hand placement also further obscures the face, adding more mystery and uniqueness. Overall, I think this was the most successful image due for all these reasons and more. |
physical edits - inspired by matthieu bourel
composition design 1
What is the aim of this shoot?
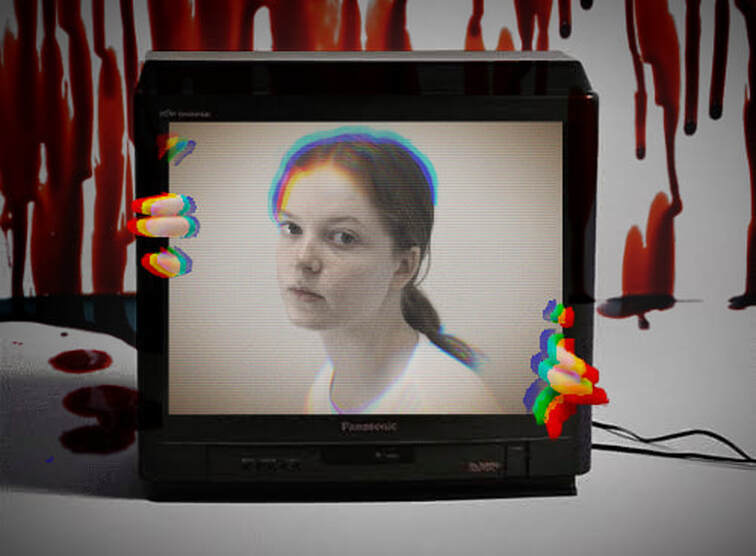
I would like to portray an atmosphere of 'fake' happiness and confusion, e.g. bright smiles with distorted facial features such as art by Anthony Gerace. I also want to use some sort of breaking of the fourth wall (an invisible, imagined wall separates subject from the real world).
I would like to portray an atmosphere of 'fake' happiness and confusion, e.g. bright smiles with distorted facial features such as art by Anthony Gerace. I also want to use some sort of breaking of the fourth wall (an invisible, imagined wall separates subject from the real world).
|
|
|

|
|
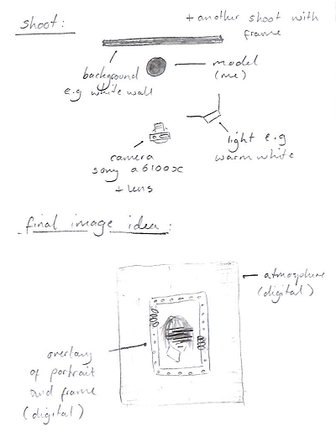
My Composition Idea:
|
What Techniques will I combine for this Project? For this composition, I'll be looking back on work from Anthony Gerace to create a new and unique image - For the main portrait, I'll be using some of his other portraiture art to create a feeling of discomfort of obscuring a person's eyes and main facial features in a portrait. I also hope to tell a story through this portrait. I will have to take a few separate photos and combine them when editing in order to create this image - First would be the main portrait, followed by taking the hand gripping on the side of the frame. Then, I'll take a simple photo of a wall area that my frame will be hung on. |
Shoot plan
I've been inspired mainly by Anthony Gerace and his plethora of portraiture work. My shoot will take place in my house, using a while wall as a background. I will need my camera, lens and tripod, however I will also use some more lights to brighten my set and face. I will also need a frame for my out-of-image feel. The light I will need is very warm and bright, creating a homely and warm sense. Preferably, I'd like to take this shoot during sunset, so I can harness the light for my advantage painting a golden wash over my face. Firstly, I would need to set up my camera with a 5 second timer, then lay out my shoot, e.g. with the correct lighting position and angle. I would then need to take around 30 - 35 photos of myself for the main subject. Next, I'd need to take some photos of myself holding the frame in a darker room with a different background to create variety. Afterwards I'd need to select my best images and edit them together to create my final composition.
contact sheet
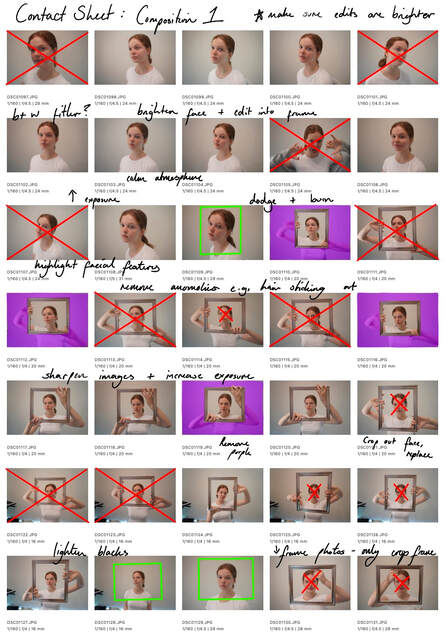
COMPOSITION DESIGN 1 edits
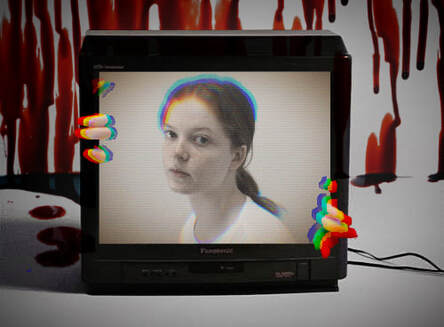
I really like this image and feel it's one of the best to come from this composition project. The first thing I like is the outer world - the old television and the dark blood contrasting the cool white backdrop. I also really like the glitch and scanlines, adding to the broken and aged aspect of the image.
|
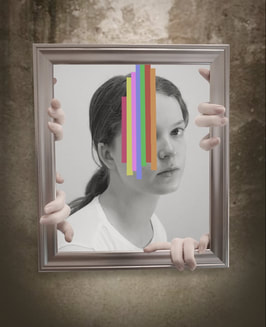
I don't think this image is as successful as the other; I would have taken more care if I had more time. I think this image would have been better if the the sharp lines were slightly blurred, creating an old and distorted effect. Next time, I will ensure I have enough time to properly create outcomes.
|
COMPOSITION DESIGN 1 - BEST EDIT
composition design 2
What is the aim of this shoot?
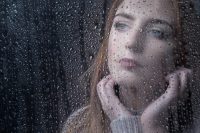
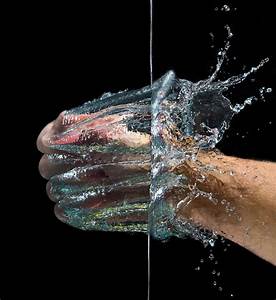
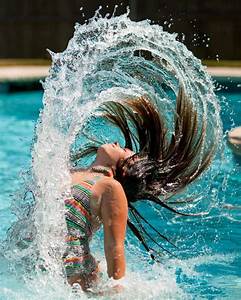
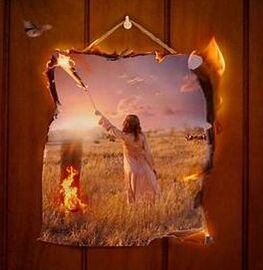
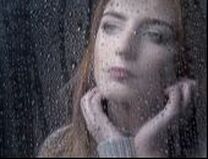
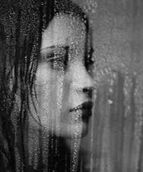
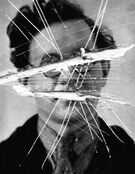
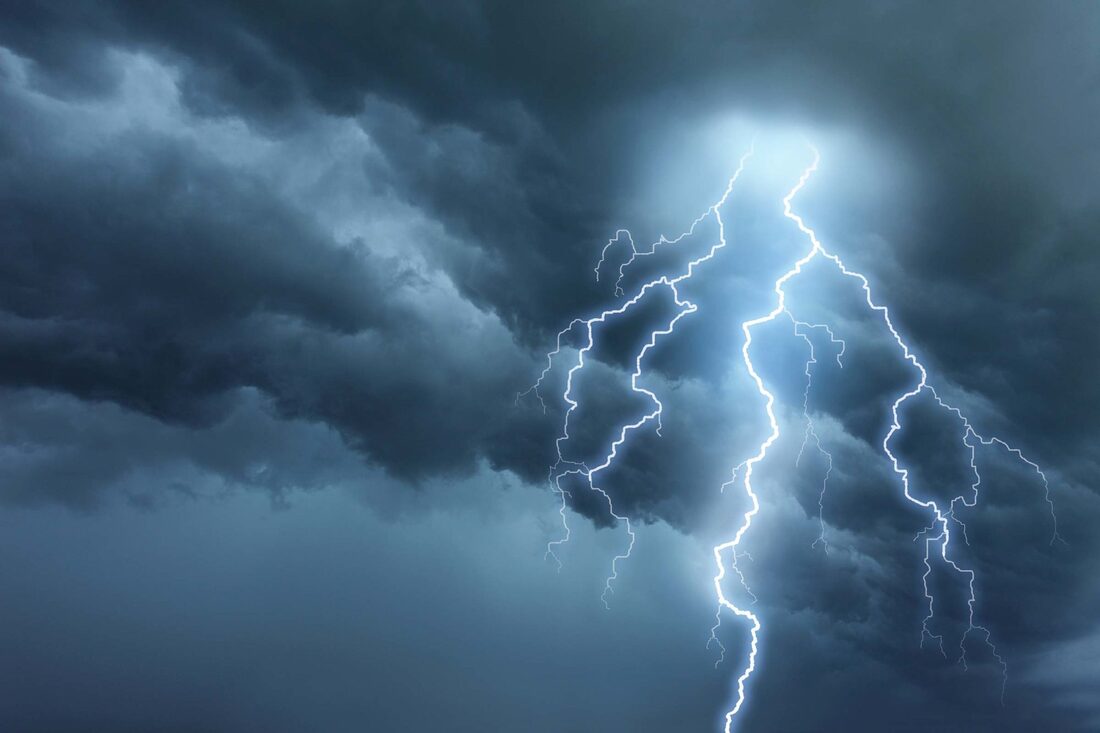
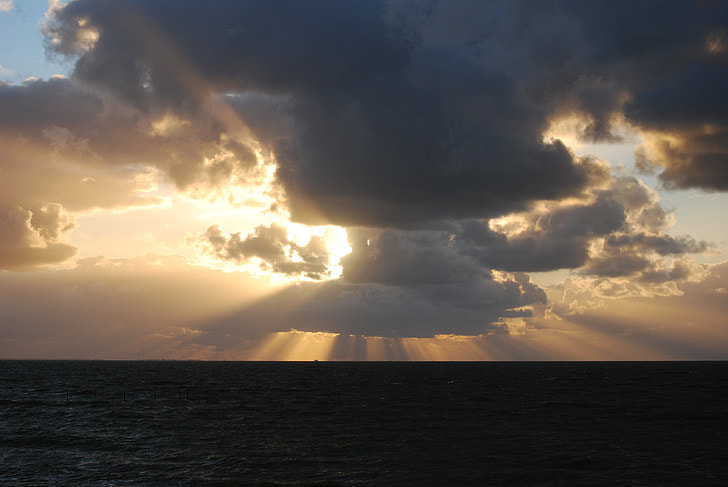
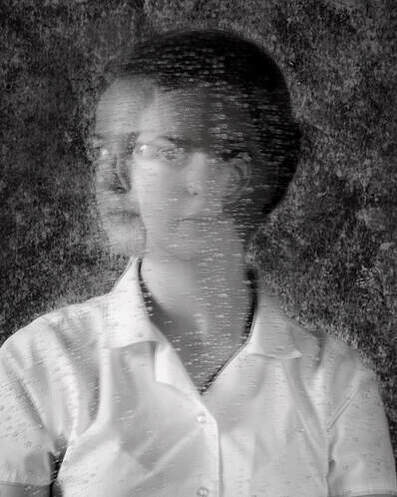
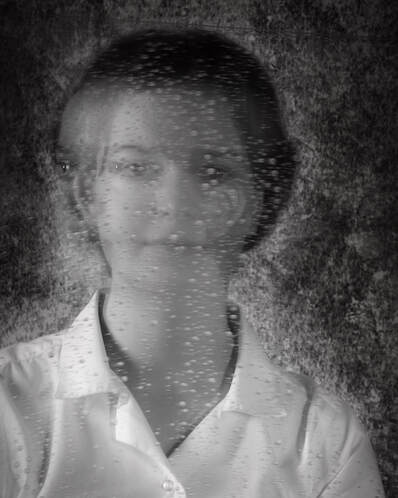
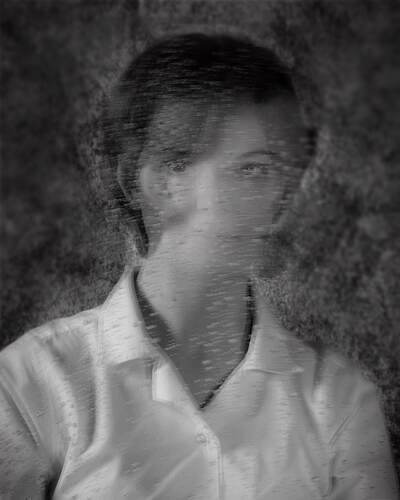
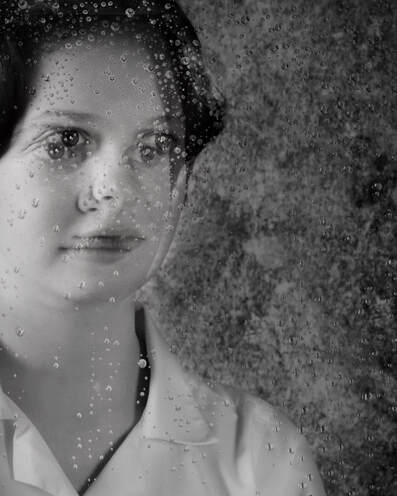
The aim of this shoot will be to create a very distorted and dark, involving water droplets and and flickers of light. I will take inspiration from pervious shoots involving long exposure/motion blur, creating distortion and mystery. The use of water droplets will also create a barrier between us as the viewer and the subject of the photograph.
The aim of this shoot will be to create a very distorted and dark, involving water droplets and and flickers of light. I will take inspiration from pervious shoots involving long exposure/motion blur, creating distortion and mystery. The use of water droplets will also create a barrier between us as the viewer and the subject of the photograph.
|
|
|
|
|
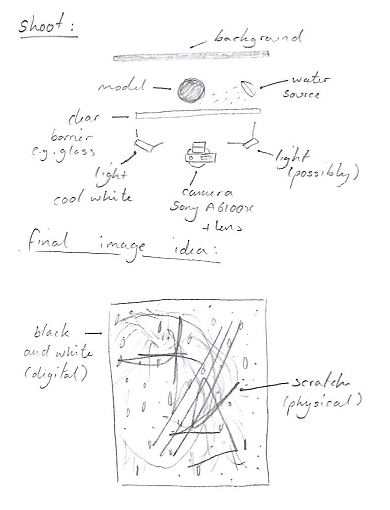
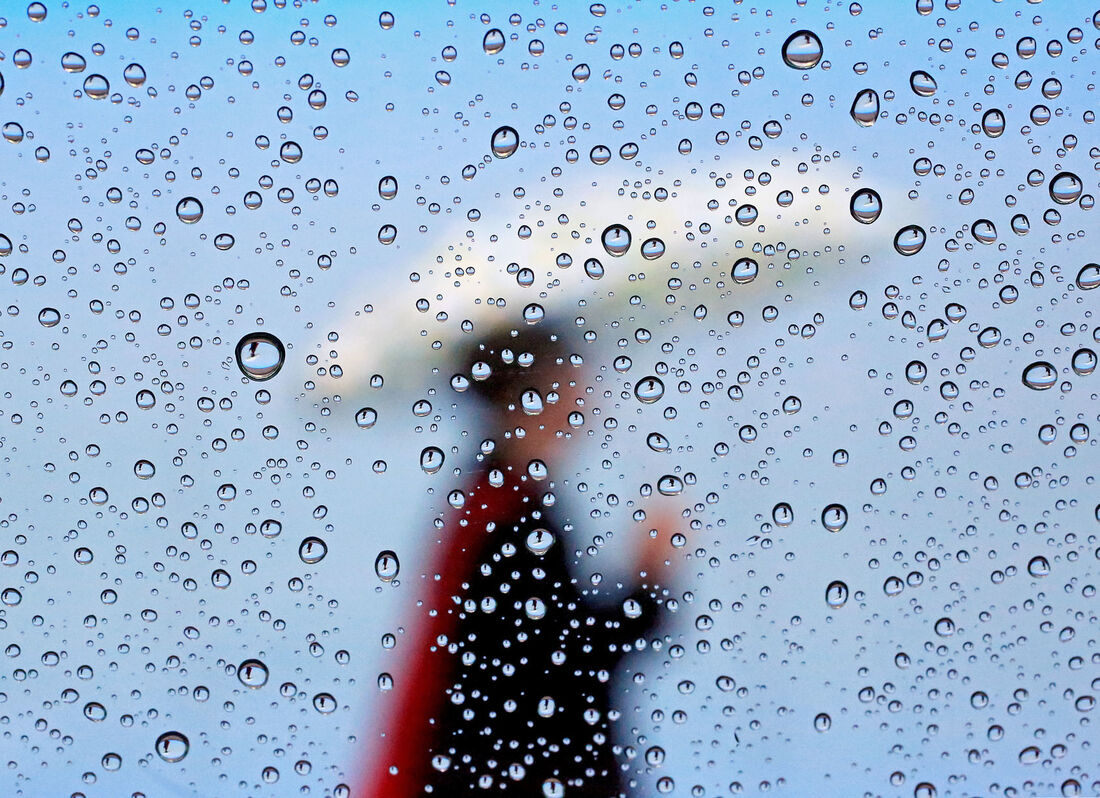
What Techniques will I combine for this Project? For this shoot, I will use long exposure and motion blur. I really like using these techniques as they create a feel of movement and unease. I will also use a clear, plastic screen to spray with water, through this technique, I will create a rain-like overlay inspired by the images above. I will also use bright white light to highlight certain features, feeling almost like a spotlight surrounding a person, revealing them. This light will also highlight the different drops across the clear plastic screen. Afterwards, I will edit a few of my images and then chose my favourite, then using this image to physically edit into through scratching and maybe sewing. My image will be quite dark and moody, with the water droplets creating pathetic fallacy, where weather depicts the moods or feelings of a person. |
My Composition Ideas:
|
shoot plan
I have been driven by my early inspirational images and the idea of incorporating rain (or the aesthetic of rain) into my composition. I really like the use of rain in portraits as it involves pathetic fallacy, where the atmosphere or weather matches the mood of a subject. My shoot will take place at home in my bathroom using the shower screen as the 'rain layer'. As for the lighting, I'll take my shoot when light is limited (dark outside). I will highlight the model using direct light, shining on the face and part of the body - I cannot use my flash as it'll glare and create a horrible image. I will need to use my remote shutter to aid me in taking photos, and I will also need a tripod to stable my shots. I will also need a strong enough light to brighten up my face in the dark, I will also need to set my camera to a long exposure and a high ISO to capture all little details. After taking my images, I will lightly edit them as I don't need to do much digital editing - instead I will be physically editing through scratching and possibly drawing over certain areas.
contact sheet
COMPOSITION DESIGN 2 Edits
|
|
composition design 3
What is the aim of this shoot?
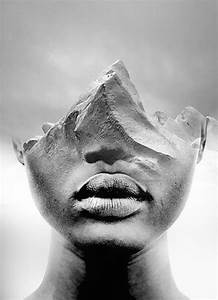
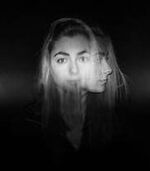
In this shoot, I will aim to combine the work of Christoffer Relander with physical editing inspired by images from my selection of early inspiration. I want to create the feeling of distortion and confusion, blending human with with inhuman. I really like these two styles and I personally feel that combining them will create a beautiful mix of physical and digital.
In this shoot, I will aim to combine the work of Christoffer Relander with physical editing inspired by images from my selection of early inspiration. I want to create the feeling of distortion and confusion, blending human with with inhuman. I really like these two styles and I personally feel that combining them will create a beautiful mix of physical and digital.
|
|
|
|
|
What Techniques will I combine for this Project? For this final composition, I will combine many different elements of earlier work and refine my skills, creating a new and interesting image. I decided to take inspiration from works by Christoffer Relander as his art combines two sides of nature - creature (humans) and plants. I will firstly take a shoot in black and white to expose the feelings of the model and strip back colours to highlight certain shapes and features. After my shoot, I will then print out my image and begin stamping or cutting out shapes and re-sticking them onto a sheet of A3 paper, creating the vortex feeling. |
shoot plan
As stated before, I have been inspired by Christoffer Relander, however I have also been inspired by the nature that surrounds me. I will take this shoot partly at home and party outside, as I will be taking photos of nature. Inside I will replicate a bright surrounding and take photos of my model's side profile. I will use bright, white light to backlight my models face in this shoot. I will need my camera, Sony a6100 with a kit lens. I will also use bright light to highlight my models face and the background. I will also need to use my tripod and timer. After my shoots, I will take some of my images into Pixlr and edit them to be double exposed. Afterwards, I will print out my final image onto A3 paper and begin to physically change and edit my image, sticking the different cut-outs onto an either pale coloured or white piece of paper.
contact sheet
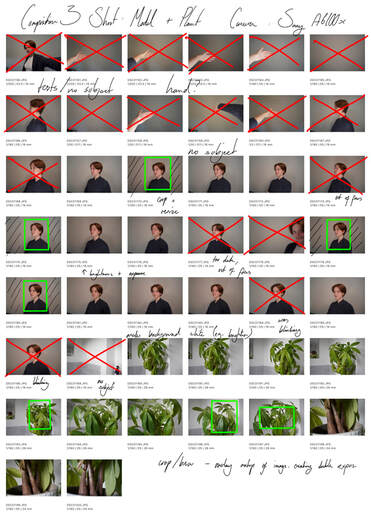
COMPOSITION DESIGN 3 EDITS
I really like how this image turned out as the mountainous effect makes it seem like a staircase up the models face. I feel that when I finish my physical edits, this image will look especially good as the individual dots will fade out the further you get from the models face. However, the editing becomes a little choppy on the outline as I forgot to fade my cut.
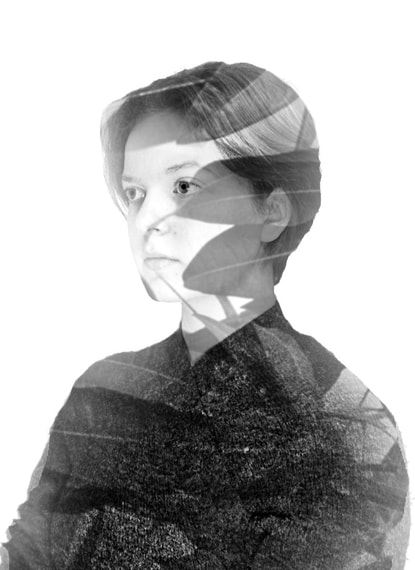
This image is my least successful image of the set as I don't like how the overplayed image falls on the face. All the editing apart from that point looks nice, yet simple. Once again, if I were to edit this image again, I would feather out the overlay around the edges because they appear blocky and choppy if you look close. Overall, this isn't one of my favourites from the series.
|
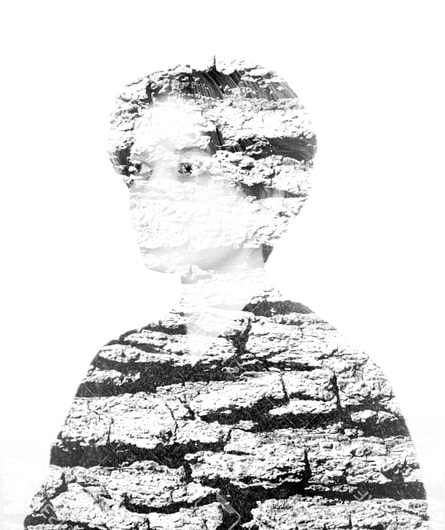
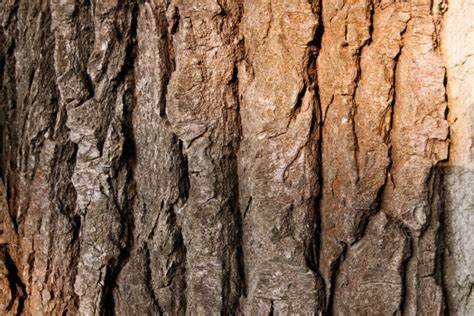
I think this image is ok, the bark pattern paints a pretty cover over the model, creating a very anonymous cover over the image. I think that to improve this image, I'll need to change the overlay to suit how I imagined this image to come out as. overall, this image is nice looking, however I do have some improvements I would make if I was doing this image edit again.
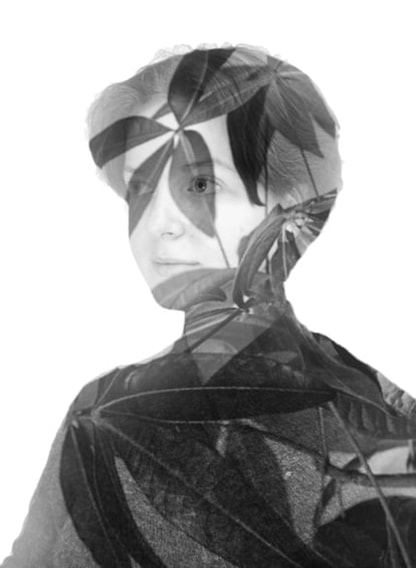
Finally, I feel this image is successful, yet not to the de3gree of the previous. I do like the effect, however, the leaves project onto the model. I like how the leave paint a unique 'shadow' over the face and the body as it highlights different areas and features. If I were to do this again, I would try and make the overlay clearer, allowing for a sharper, more impactful image.
|
Evaluation
Throughout this project, I have explored Portraiture and Identity through experimentation and learning how to craft compositions. I have gained new knowledge and skills by gradually working through this project, developing my understanding of what Portraiture & Identity means.
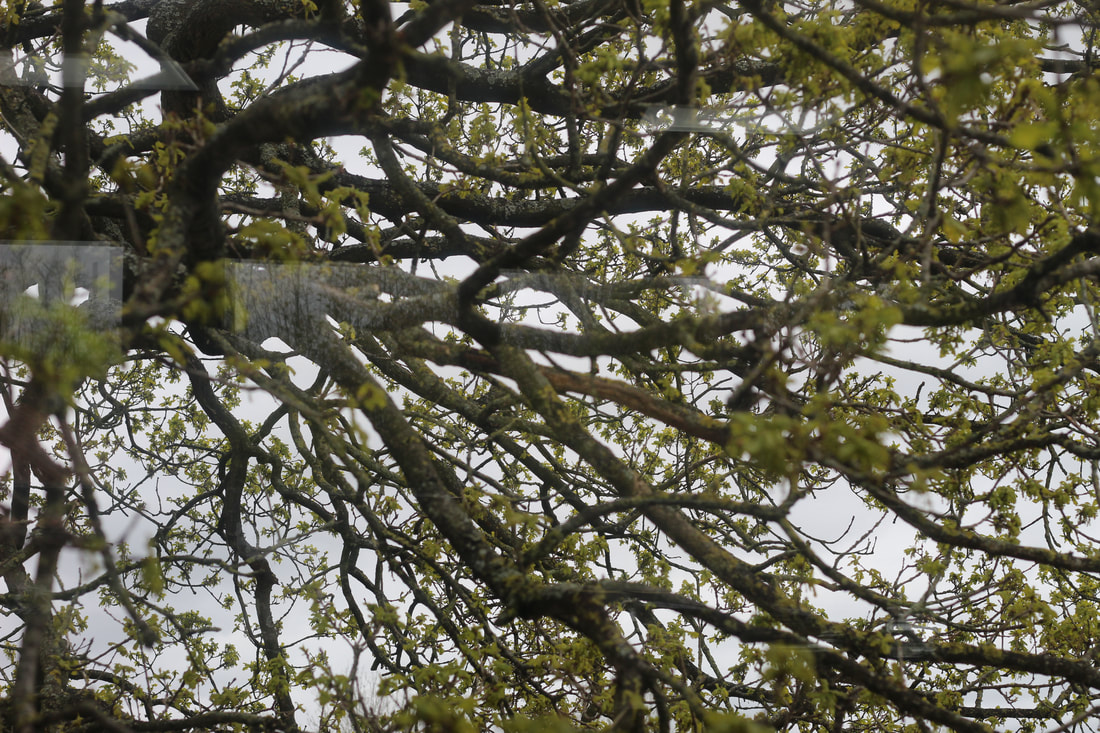
Initially, I researched double and multi exposure. I was really inspired by these techniques as it can be used to present two sides to someone, creating a ghostly feel of something more behind a smile. When looking at images using double and multi exposure, I was able to explore concepts of balance, movement and texture. In my own examples involving double and multi exposure, I was able to use balance to my advantage, through blending the human and the non-human together to create a new image altogether. I was also able to include textures into my examples, especially with using tree branches, decorated with newly sprouting leaves. I created this series of emulations by combining my model and a picture of a landscape/woodland area through the editing software Pixlr. I then investigated technical processes that were involved in making these images, such as framing and composition; learning to use a tripod and lighting to my advantage and exploring different settings and feature I hadn’t previously used on my camera. Creating these double and multi exposure emulations helped me understand the theme of Portraiture and Identity by showing me how you don’t need to see the whole face for it to be a portrait. Through this, I’ve been able to think of large, more detailed concepts with basis that these beginner emulations gave me.
Afterwards, I studied the work of Christoffer Relander, inspired by the way he cleverly blends human and non-human forms together, something I had done previously while investigating double and multi exposure. Through studying his work, I was able to understand the elements of rhythm, contrast and unity. Relander is a very clever photographer in the way he blends many different concepts into a single work of art, for example he usually uses low contrast to achieve a smooth, almost harmonic image. This unity gives a calming feeling, with the soft colours bringing a comforting aspect to his photography. Studying Relander’s work also helped me in investing technical processes like further developing my editing skills and learning about using different colours to emphasise emotions to the viewer, acting almost like a story. Relander’s work helped me greatly in understanding Portraiture and Identity to the level I do now as their work provides a lovely contrast between human and nature – presenting human emotions through the means of something very non-human. Furthermore, I greatly enjoyed studying his work and creating my own emulations. The best edit from my edits inspired by Relander still remains one of my favourites today.
I then went onto exploring different shutter speeds, including long exposure, motion blur and light drawing.
The first of these investigations was long exposure. This was reminiscent of the double and multi exposure from the first topic I looked into. Long exposure combines many different elements of photography, namely movement and from. I attempted to emulate these elements in my own photography by creating a series of inspired images by doing a shoot using a tripod and a background other than white. This introduced a new way of editing as the overall image was much darker, calling for more contrast. I feel I achieved movement and form well, as there is a clear outline of my model and also a clear path of movement she took.
Secondly, I investigated motion blur. Although similar to long exposure, this technique uses a light source to enhance the movements of the model, painting streaks of light onto the photograph. Through this technique, I was able to explore colour and contrast. As opposed to the black background, the light helped to make my images pop. I could also explore contrast through this addition of colour I hadn’t used before. Using light like this wasn’t something I had done before, and so learning about this technical process benefitted my knowledge of Portraiture and Identity too.
Lastly, I investigated light drawing using a very slow shutter speed. This combined both motion blur and long exposure, presenting a challenge for myself. Inspired by a video I had seen, I explored elements such as line, shape and movement. Shutter speed mainly involves movement, which I feel I was able to achieve in this experimental shoot. I created this series of illustrations through blacking out a relatively large room, turning the shutter speed to roughly 20 and then proceeding to run around the room until the shutter closed – this method created some really interesting images due to the shape the light created on the image.
Through studying different forms of shutter speed, I learned so much about building compositions that work well, all benefitting my knowledge of Portraiture and Identity. Later in my project, I would go onto including long exposure in later shoots, linking throughout my whole project.
The last artist I studied in my Portraiture and Identity project was Anthony Gerace. I enjoyed every moment I investigated and emulated Gerace’s work as I really found a love and appreciation for how he carefully crafts his images, dedicating time to editing and developing them. His artwork involves many different elements, however the most prominent in his techniques would be shape, space and colour. Through the emulations, I was able to understand these techniques that Anthony employs in his work, like editing the grid and removing different sections, creating space and colour in the images. His artwork helped me understand and find a passion in Portraiture and Identity as these artworks helped me build an understanding of the passion so many people have for this type of photography, and it also helped me build a stronger confidence in my own editing ability.
Composition 1, 2 and 3 were the points in which I was able to express myself and use the skills I had built up over the course of this project; each one of these projects centring around different moods/feelings/emotions. These compositions involved a lot of contrast, shape and movement, from the sharp lines of my frame from composition 1, to the unhinged ripping of my second composition artwork. These three compositions involved a lot of technical work, like digital and physical editing and the actual shoots themselves. As this was the last pieces of work I will be completing on Portraiture and Identity, I feel I have gotten a stable understanding of the project from all my previous work, wrapping it up well with my outcomes from this project.
I feel my successful outcomes from this project would have to be research. Research is one of my favourite parts of these projects as I can learn and understand the motives surrounding the artists creations. I feel my shoot plans were detailed, and my overall writing was clear and descriptive.
Improvements I would employ in the future would be improving my understanding of camera settings, getting clearer images to work with. I would also like to improve the quantity of my photos taken from a photoshoot, allowing for more creativity and level of compositions I’m able to create.
